WisExpenseOpen the app
Topics

Restore your data

Put the data from a backup file back into your account, adding to what you have or replacing it.

Show steps for

Restoring reads a backup file you downloaded from WisExpense and puts its data into your account. You see what the file contains before anything changes, and you choose whether to add to your data or replace it.

Before you start

You need the Standard plan or higher. On the Free plan the app says that restoring from a backup needs the Standard plan, and offers See plans. You also need a backup file (.xlsx) made by WisExpense: see Back up your data. The file can come from another account, for example a new one.

Steps

Web
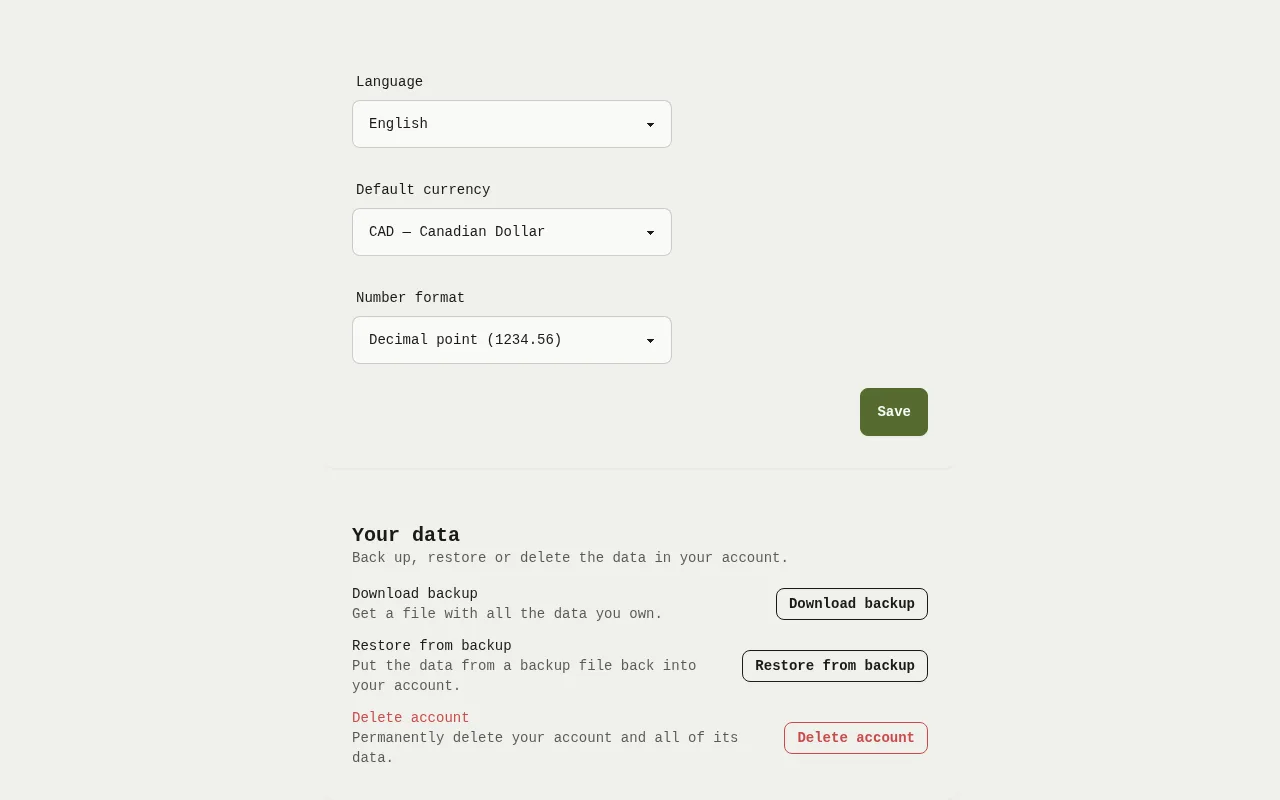
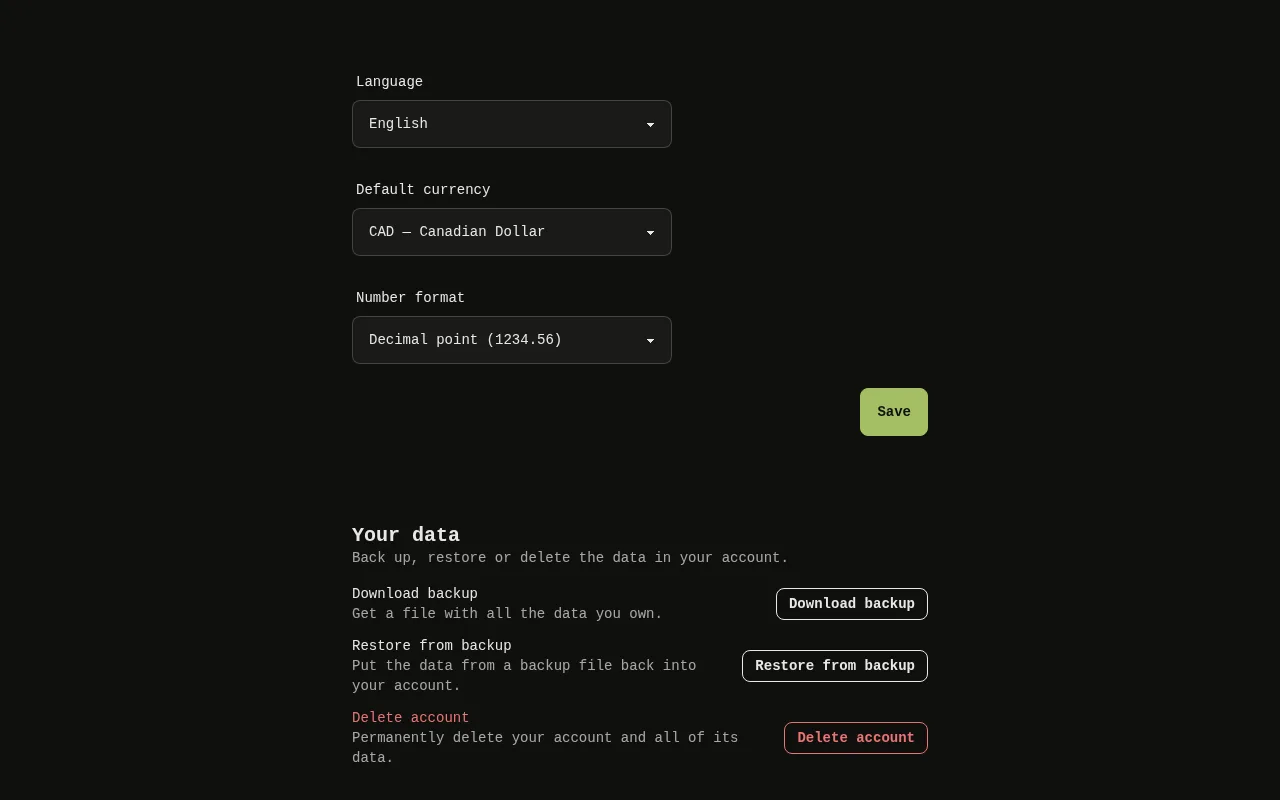
The Your data card on the Settings screen of the web app, with the Restore from backup button.The Your data card on the Settings screen of the web app, with the Restore from backup button.
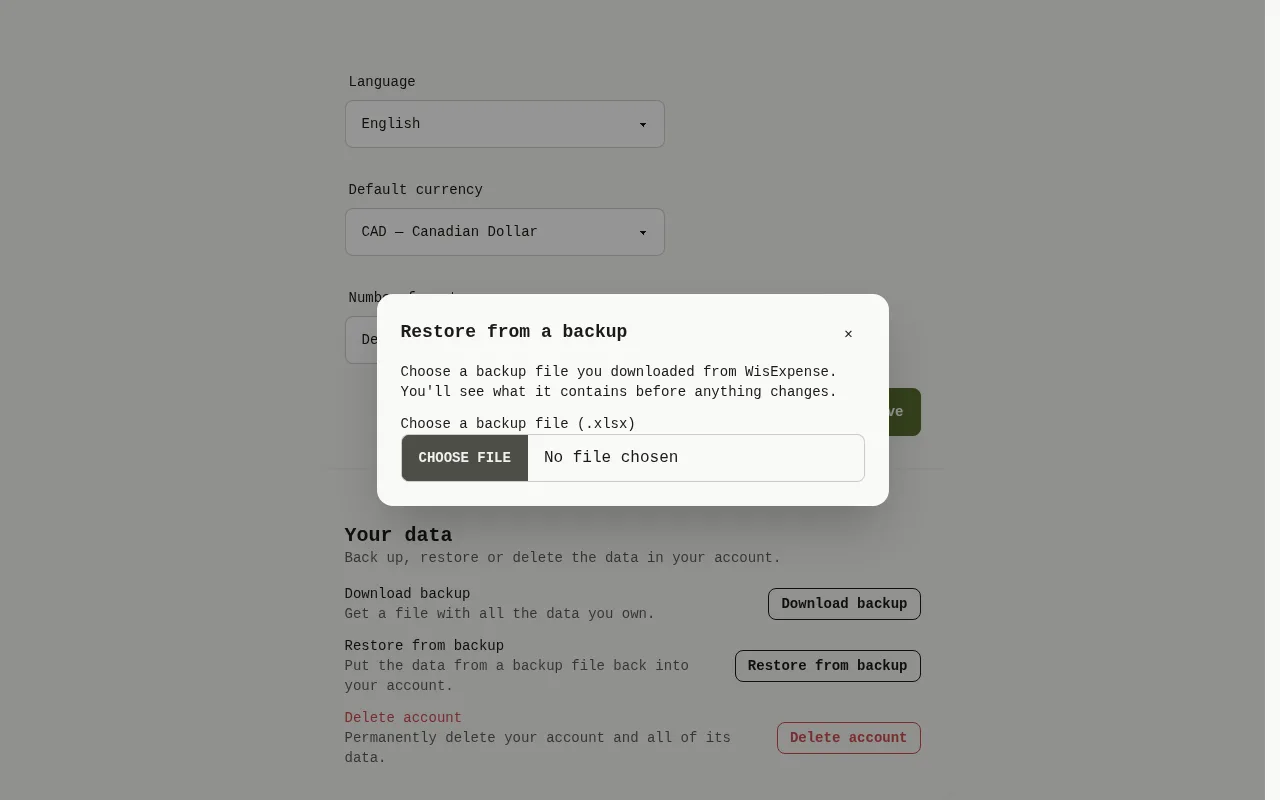
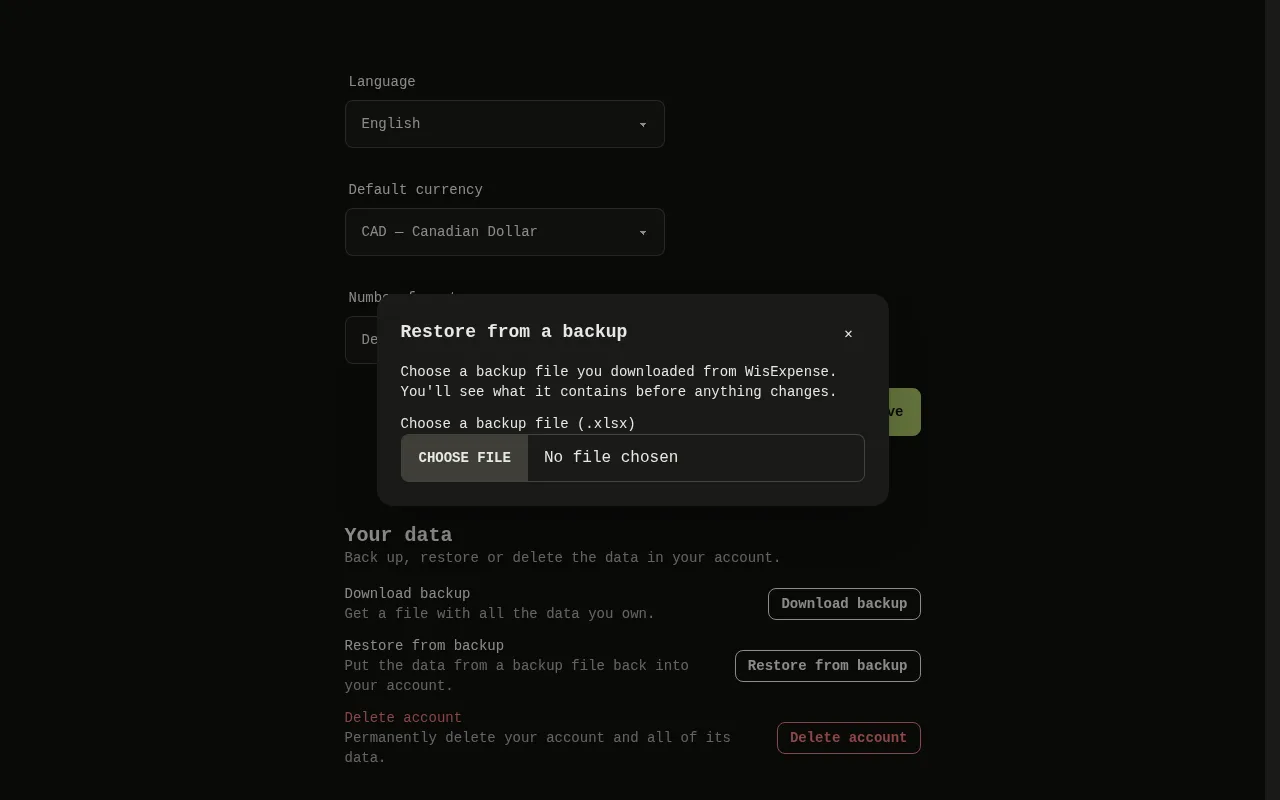
The Restore from a backup window of the web app, with the Choose a backup file (.xlsx) button. 1: Select Choose a backup file (.xlsx) and pick your file. The window reads Checking the file….The Restore from a backup window of the web app, with the Choose a backup file (.xlsx) button. 1: Select Choose a backup file (.xlsx) and pick your file. The window reads Checking the file….
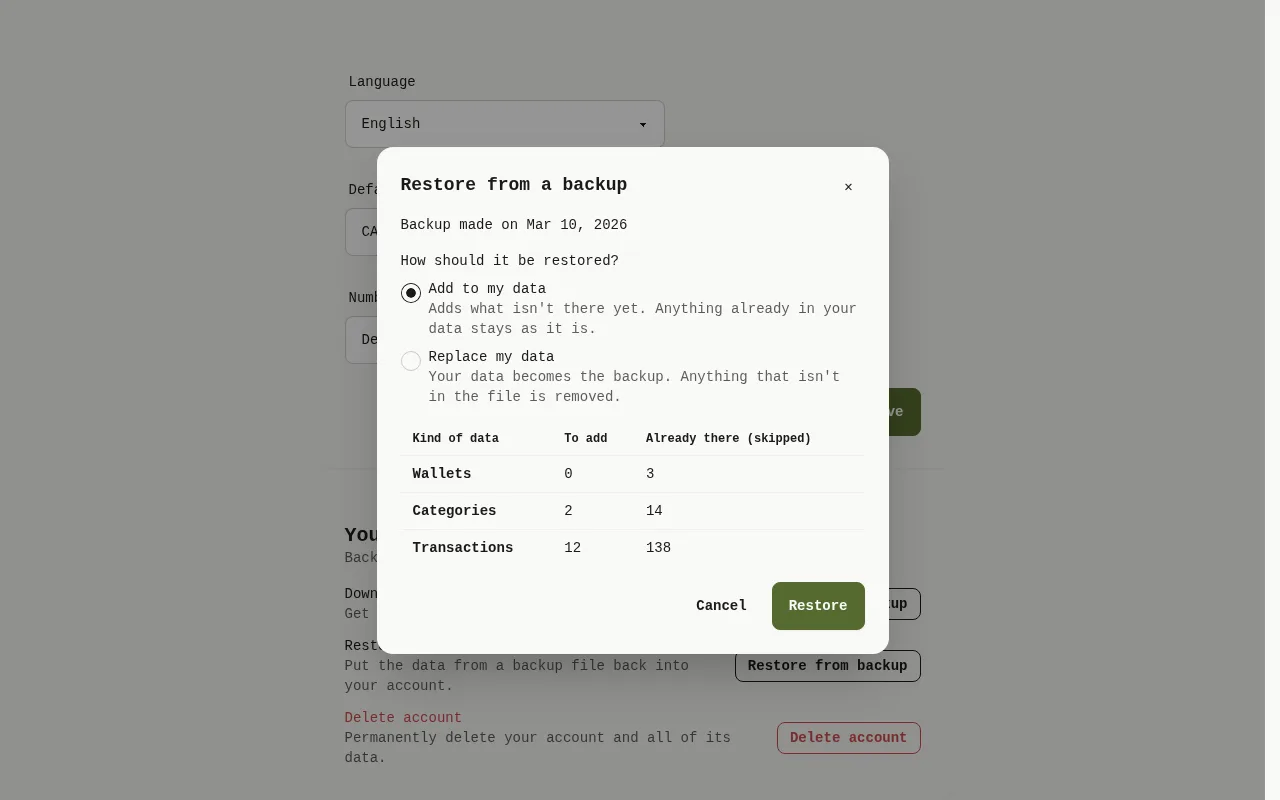
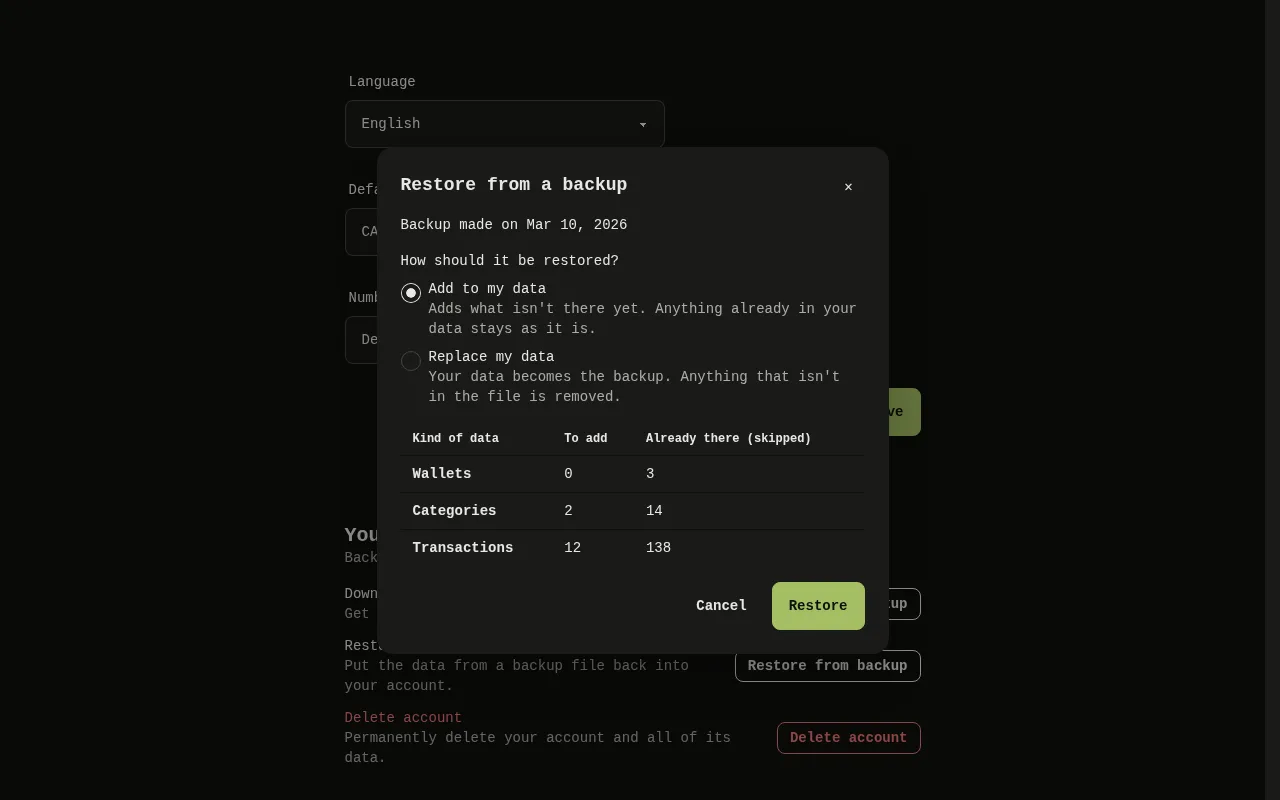
The window of the web app showing what the backup contains, a table of counts per kind of data, the choice between Add to my data and Replace my data, and the Restore button. 2: The window shows What this backup contains, with the date it was made. The table lists, for each kind of data, what is To add and what is Already there (skipped); 3: Under How should it be restored? choose a mode. Nothing is chosen for you; 4: Select Restore.The window of the web app showing what the backup contains, a table of counts per kind of data, the choice between Add to my data and Replace my data, and the Restore button. 2: The window shows What this backup contains, with the date it was made. The table lists, for each kind of data, what is To add and what is Already there (skipped); 3: Under How should it be restored? choose a mode. Nothing is chosen for you; 4: Select Restore.
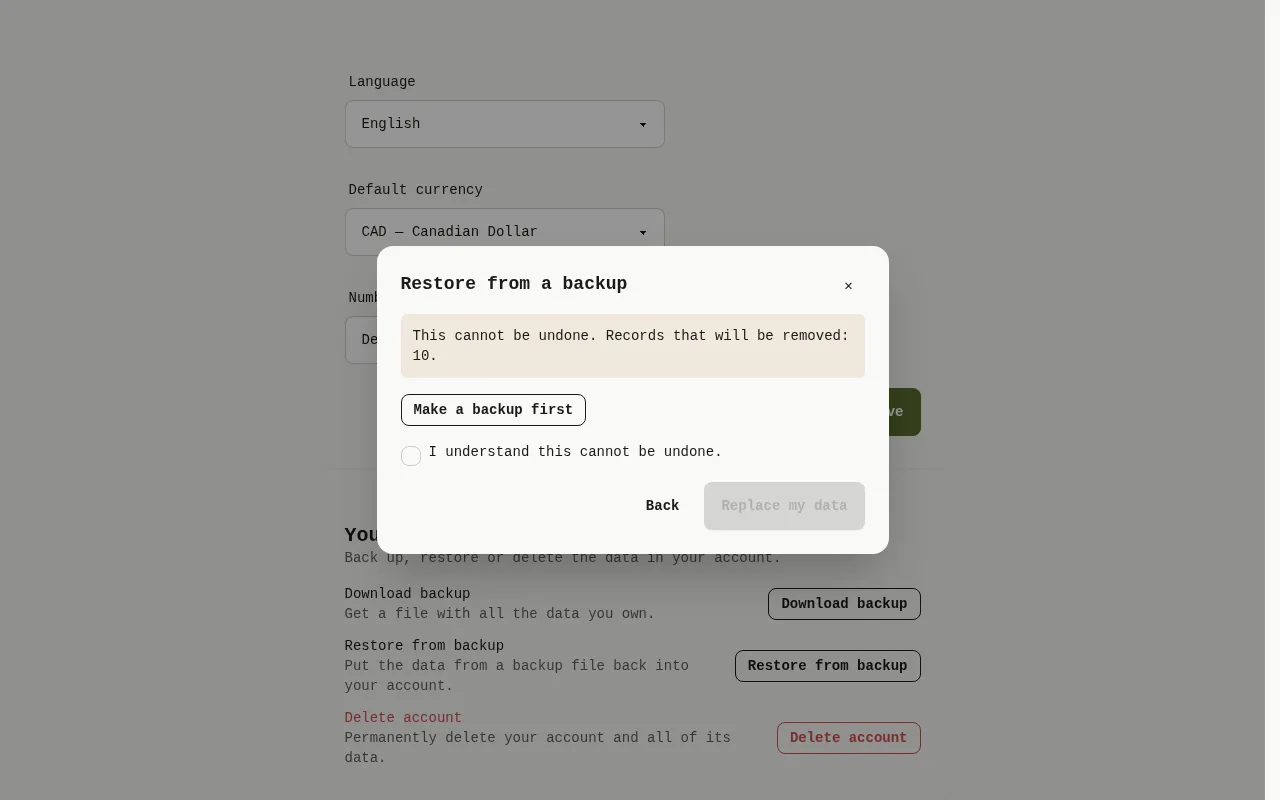
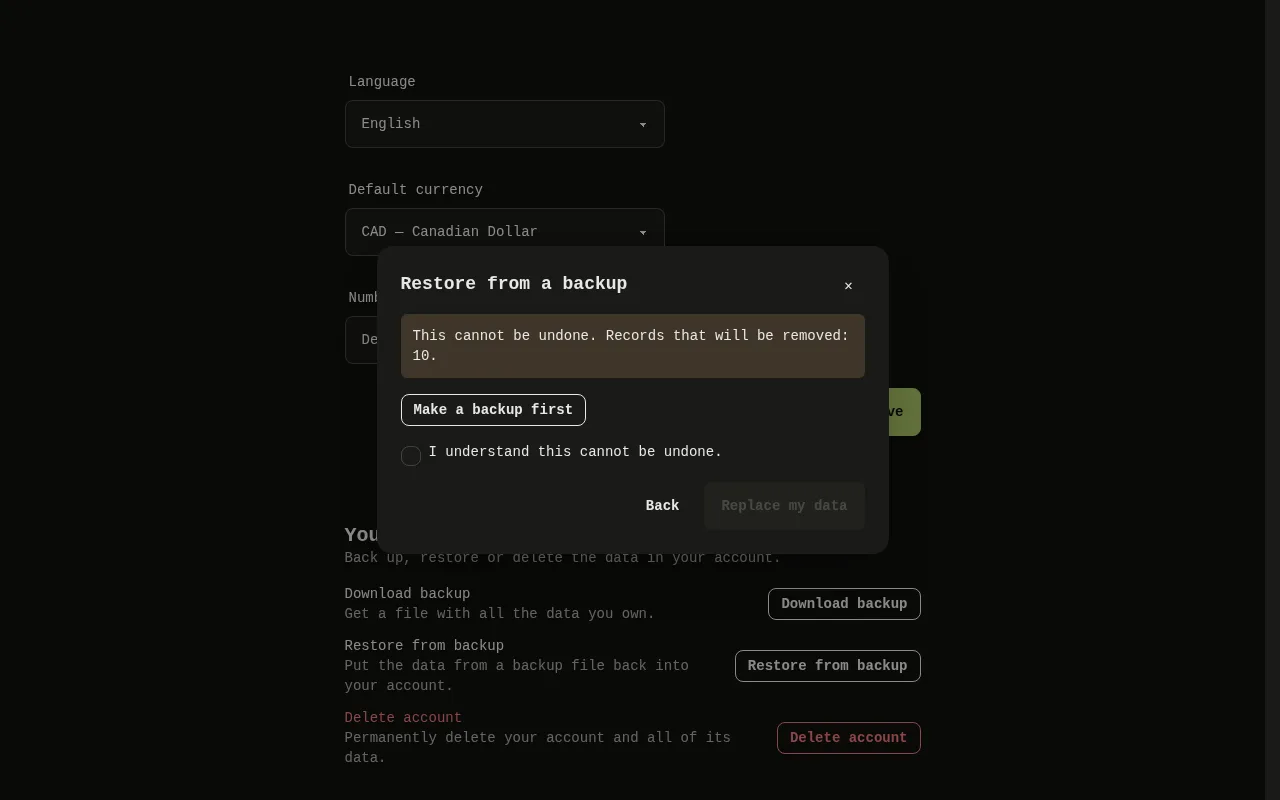
The window of the web app warning that replacing cannot be undone and how many records will be removed, with a checkbox to confirm and the Replace my data button. 5: If you chose Replace my data, a warning says that this cannot be undone and how many records will be removed. You can Make a backup first. To go on, tick I understand this cannot be undone., then select Replace my data; 6: If you chose Replace my data, a warning says that this cannot be undone and how many records will be removed. You can Make a backup first. To go on, tick I understand this cannot be undone., then select Replace my data; 7: If you chose Replace my data, a warning says that this cannot be undone and how many records will be removed. You can Make a backup first. To go on, tick I understand this cannot be undone., then select Replace my data.The window of the web app warning that replacing cannot be undone and how many records will be removed, with a checkbox to confirm and the Replace my data button. 5: If you chose Replace my data, a warning says that this cannot be undone and how many records will be removed. You can Make a backup first. To go on, tick I understand this cannot be undone., then select Replace my data; 6: If you chose Replace my data, a warning says that this cannot be undone and how many records will be removed. You can Make a backup first. To go on, tick I understand this cannot be undone., then select Replace my data; 7: If you chose Replace my data, a warning says that this cannot be undone and how many records will be removed. You can Make a backup first. To go on, tick I understand this cannot be undone., then select Replace my data.
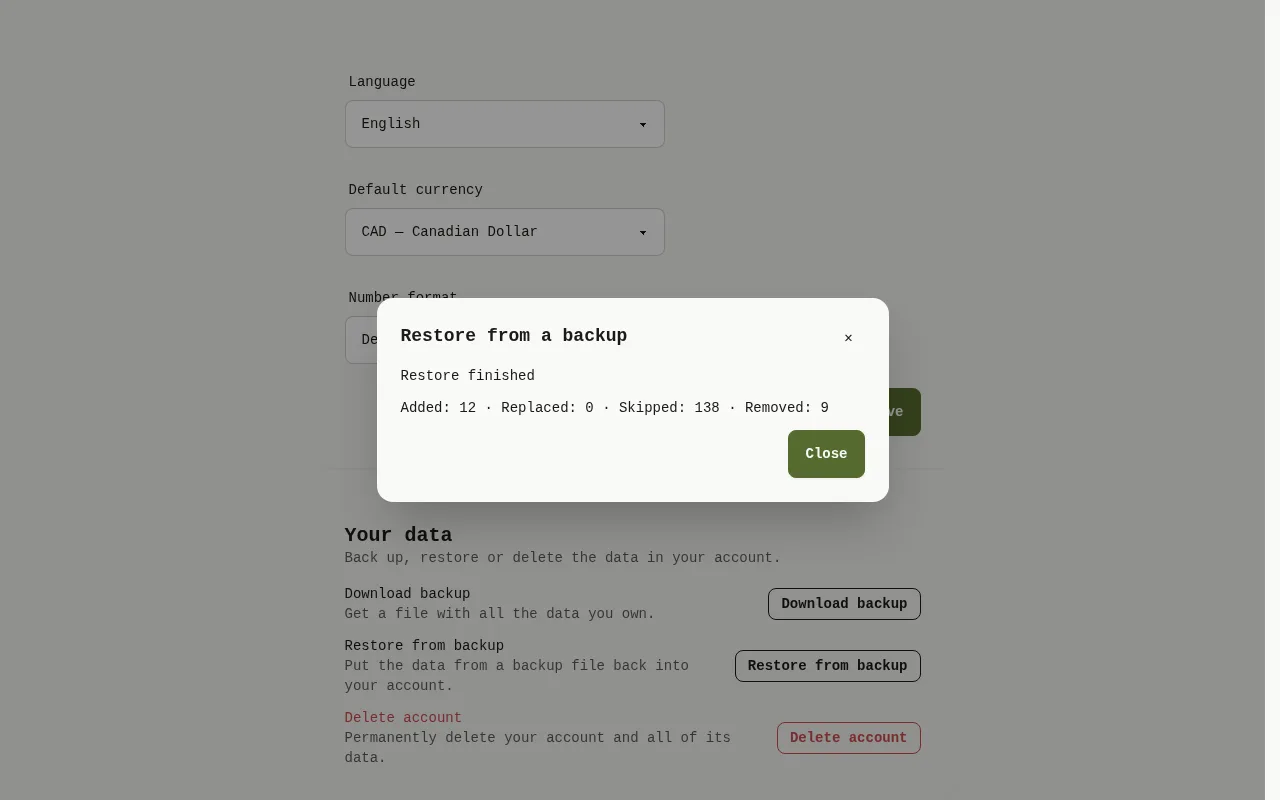
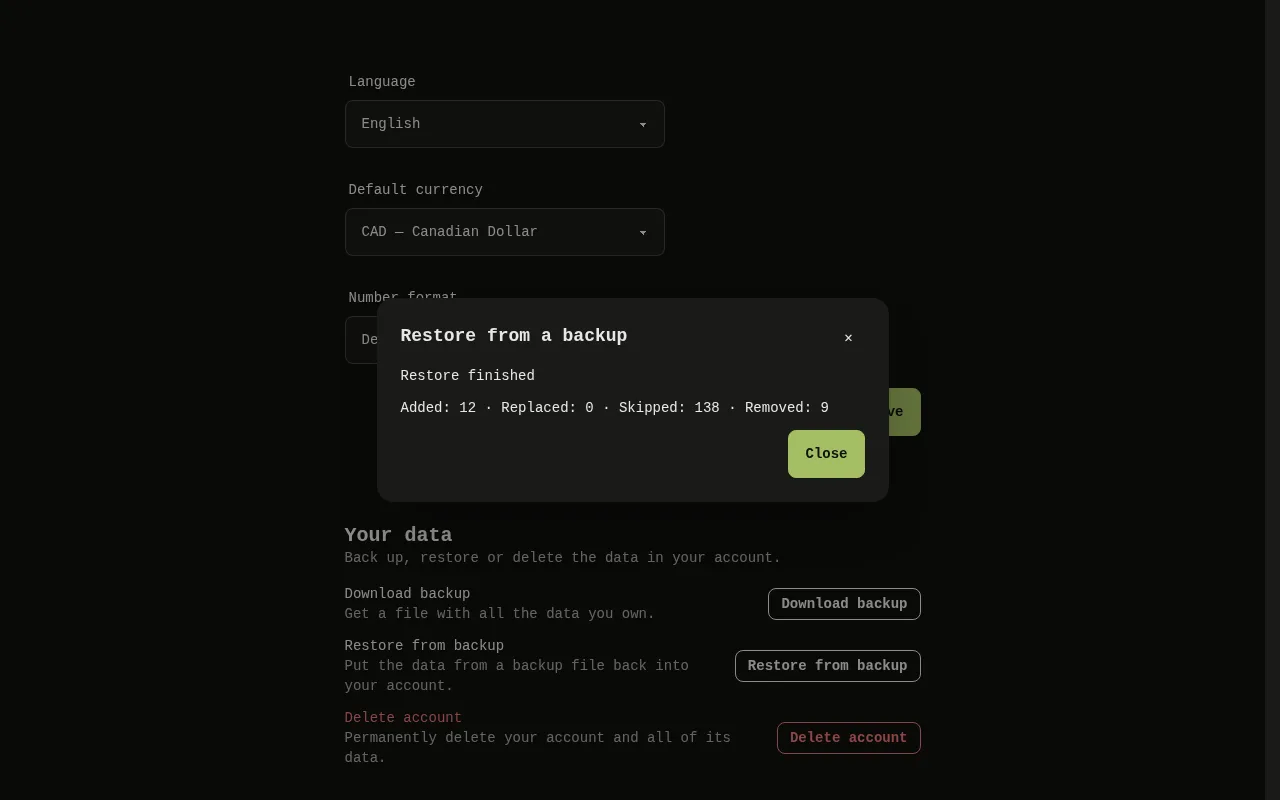
The Restore finished window of the web app, with the number of records added, replaced, skipped and removed. 8: Restore finished shows the counts “Added”, “Replaced”, “Skipped” and “Removed”. If the file can’t be restored, for example because it isn’t a WisExpense backup or has been changed, the app says so and nothing is changed. Restored records don’t send you budget alerts.The Restore finished window of the web app, with the number of records added, replaced, skipped and removed. 8: Restore finished shows the counts “Added”, “Replaced”, “Skipped” and “Removed”. If the file can’t be restored, for example because it isn’t a WisExpense backup or has been changed, the app says so and nothing is changed. Restored records don’t send you budget alerts.
  1. Select Settings, then in the Your data card select Restore from backup. The Restore from a backup window opens.
  2. Select Choose a backup file (.xlsx) Marker 1 and pick your file. The window reads Checking the file….
  3. The window shows What this backup contains, with the date it was made. The table lists, for each kind of data, what is To add and what is Already there (skipped) Marker 2.
  4. Under How should it be restored? choose a mode Marker 3. Nothing is chosen for you.
    • Add to my data adds what isn’t there yet. Anything already in your data stays as it is.
    • Replace my data makes your data the backup. Anything that isn’t in the file is removed.
  5. Select Restore Marker 4.
  6. If you chose Replace my data, a warning says that this cannot be undone and how many records will be removed Marker 5. You can Make a backup first. To go on, tick I understand this cannot be undone. Marker 6, then select Replace my data Marker 7.

Mobile
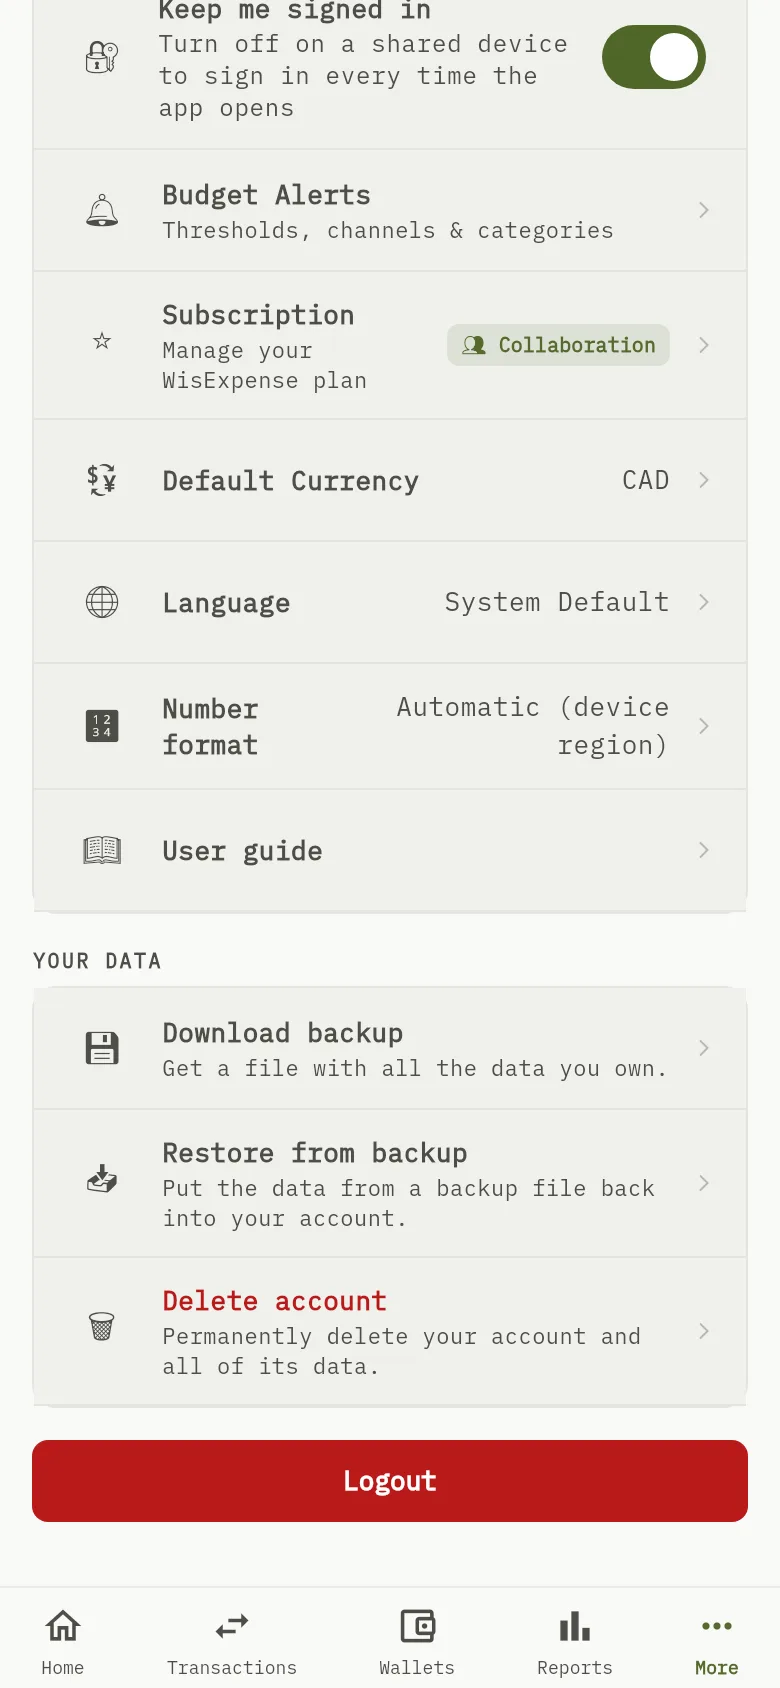
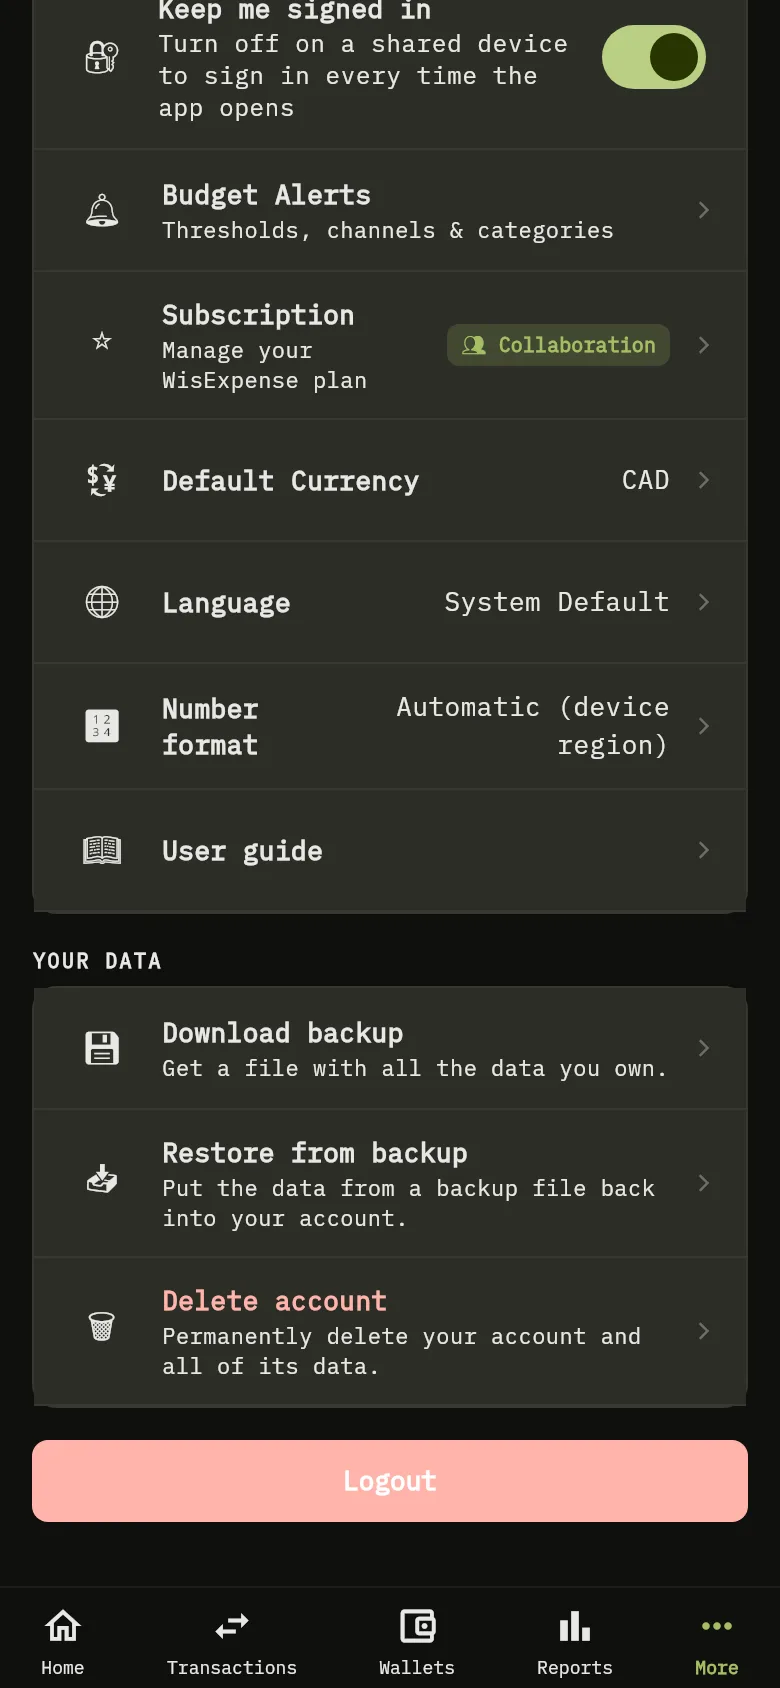
The Your data section of the More screen of the mobile app, with the Restore from backup row.The Your data section of the More screen of the mobile app, with the Restore from backup row.
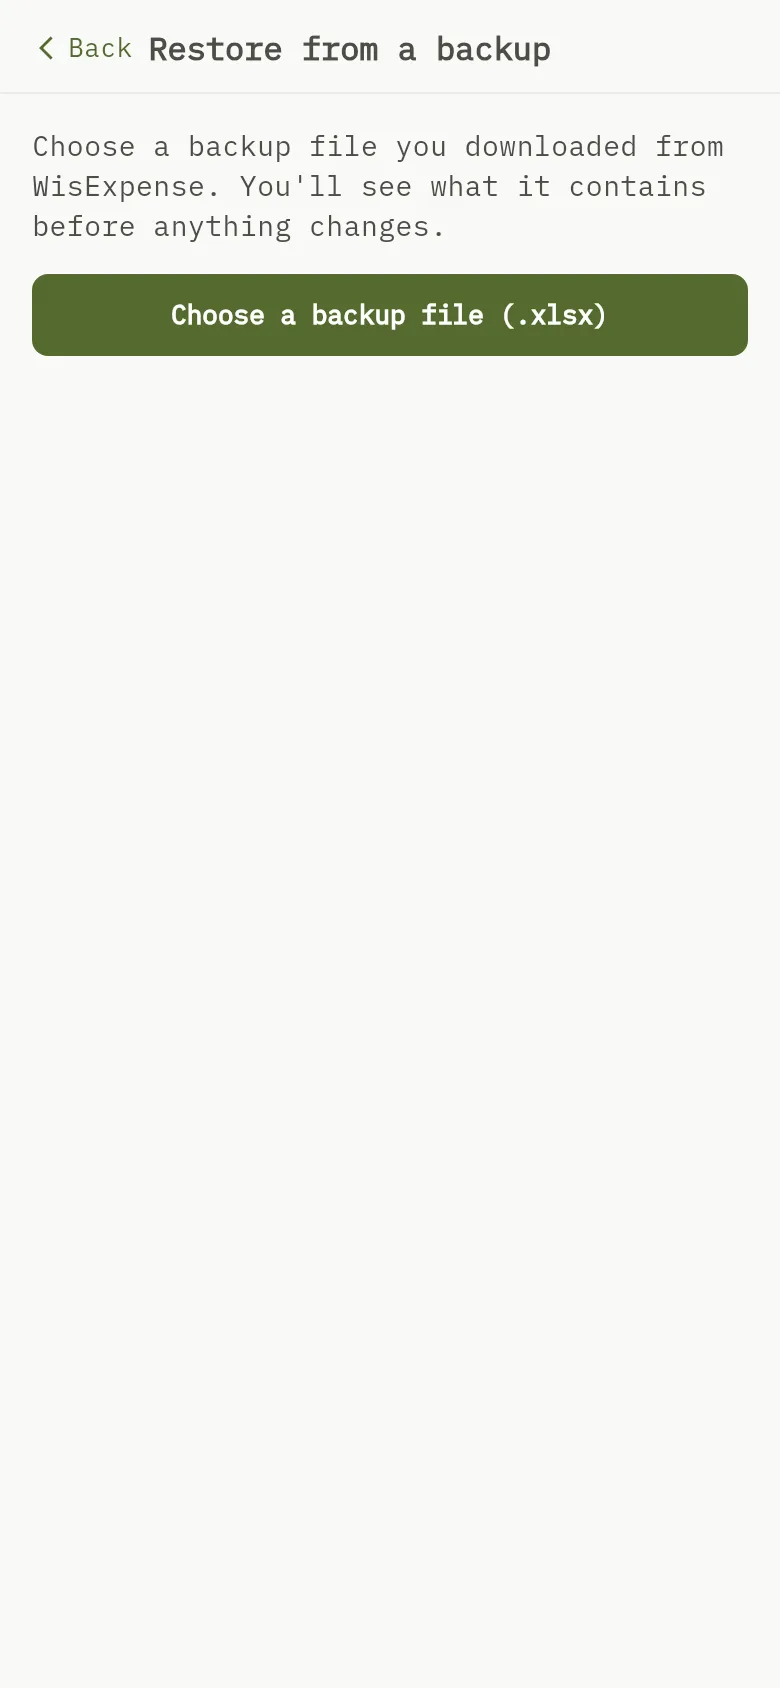
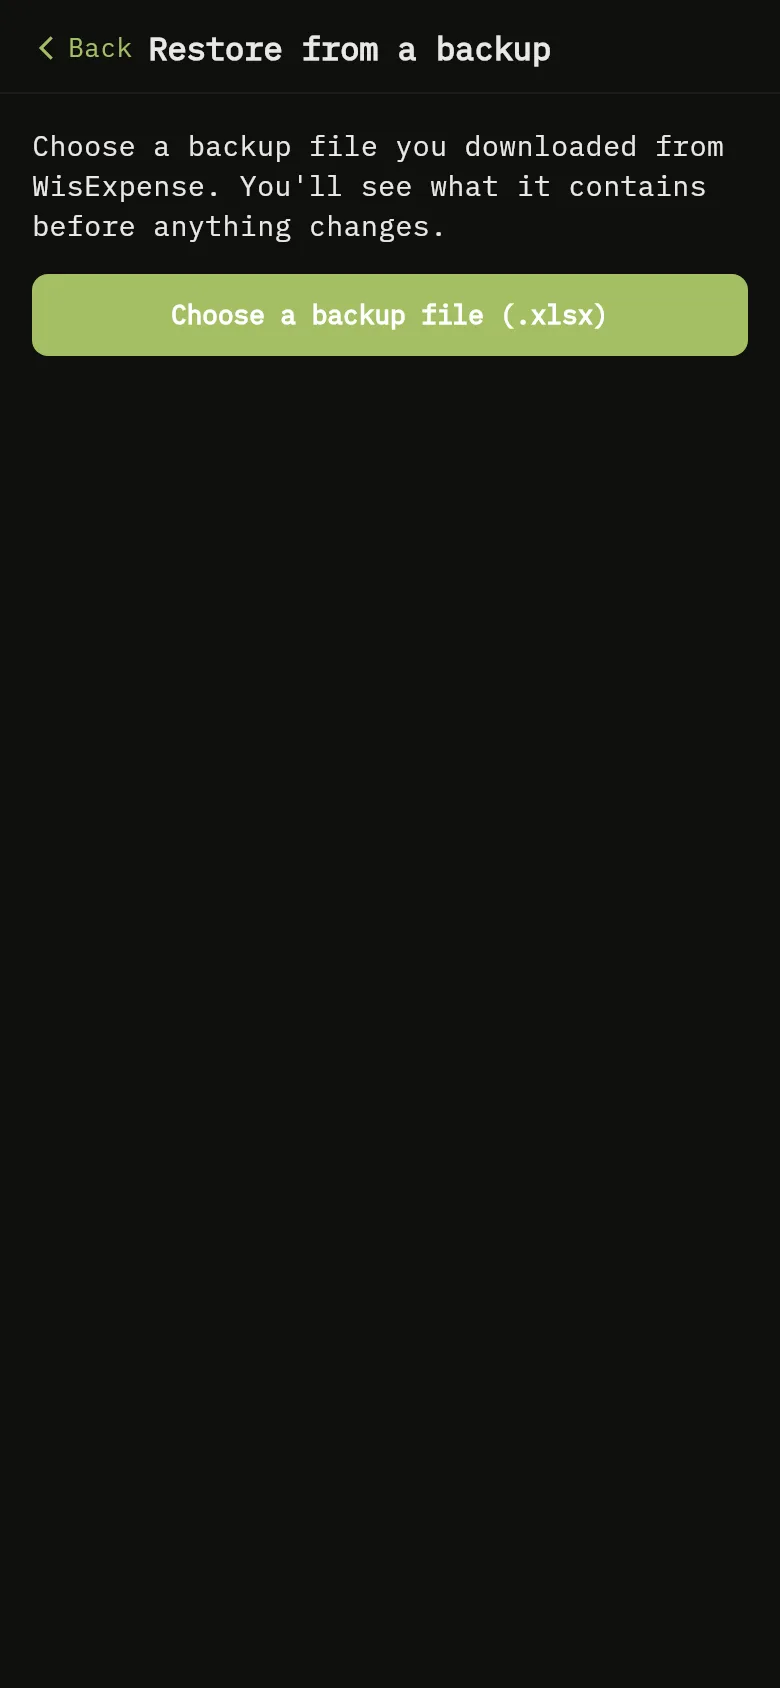
The Restore from a backup screen of the mobile app, with the Choose a backup file (.xlsx) button. 1: Tap Choose a backup file (.xlsx) and pick your file. The screen reads Checking the file….The Restore from a backup screen of the mobile app, with the Choose a backup file (.xlsx) button. 1: Tap Choose a backup file (.xlsx) and pick your file. The screen reads Checking the file….
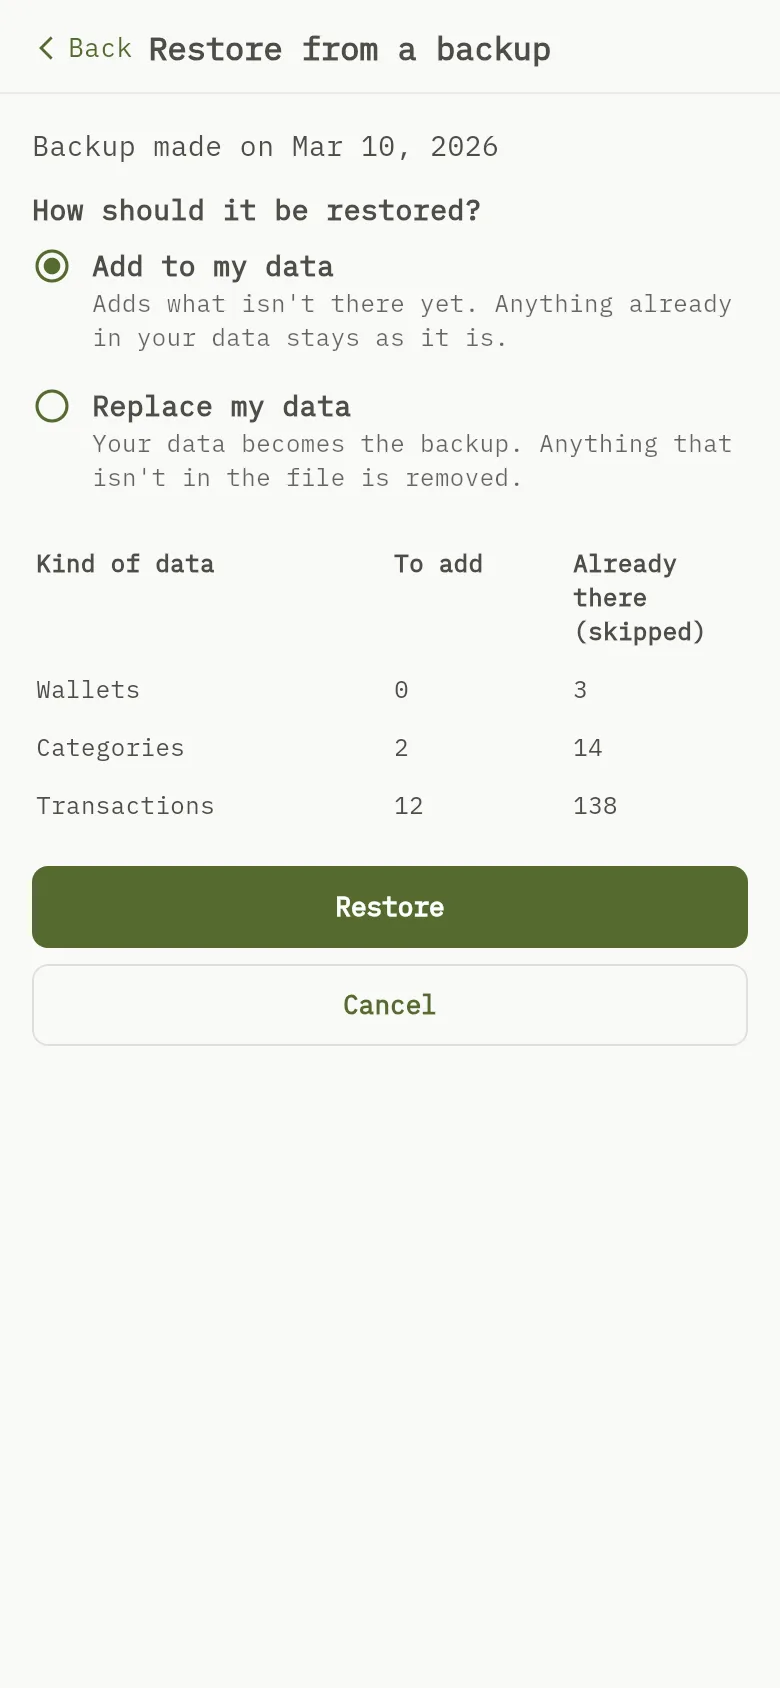
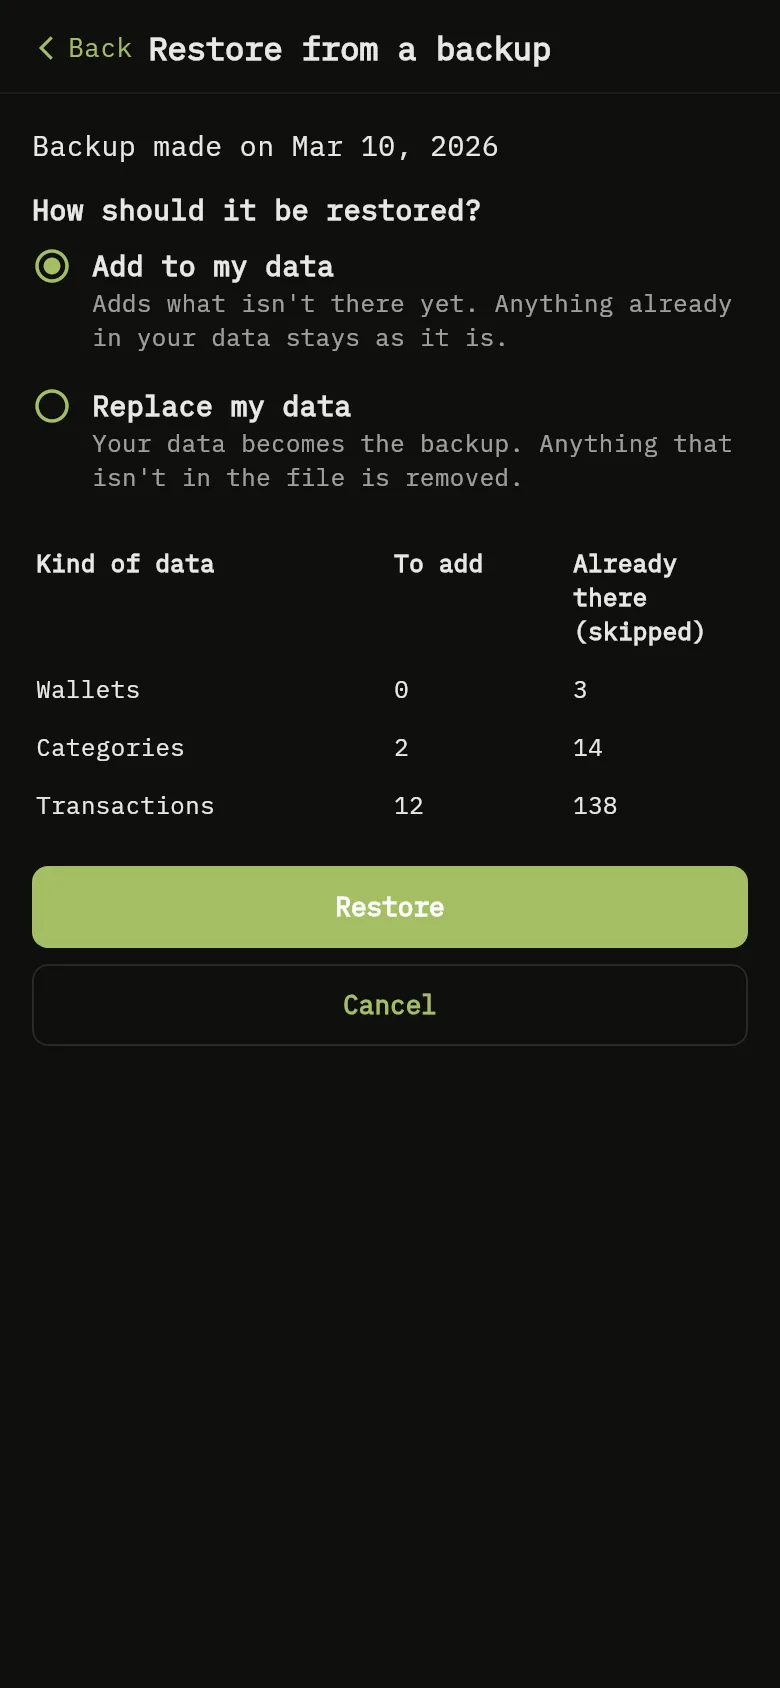
The screen of the mobile app showing what the backup contains, a table of counts per kind of data, the choice between Add to my data and Replace my data, and the Restore button. 2: The screen shows What this backup contains, with the date it was made. The table lists, for each kind of data, what is To add and what is Already there (skipped); 3: Under How should it be restored? choose a mode. Nothing is chosen for you; 4: Tap Restore.The screen of the mobile app showing what the backup contains, a table of counts per kind of data, the choice between Add to my data and Replace my data, and the Restore button. 2: The screen shows What this backup contains, with the date it was made. The table lists, for each kind of data, what is To add and what is Already there (skipped); 3: Under How should it be restored? choose a mode. Nothing is chosen for you; 4: Tap Restore.
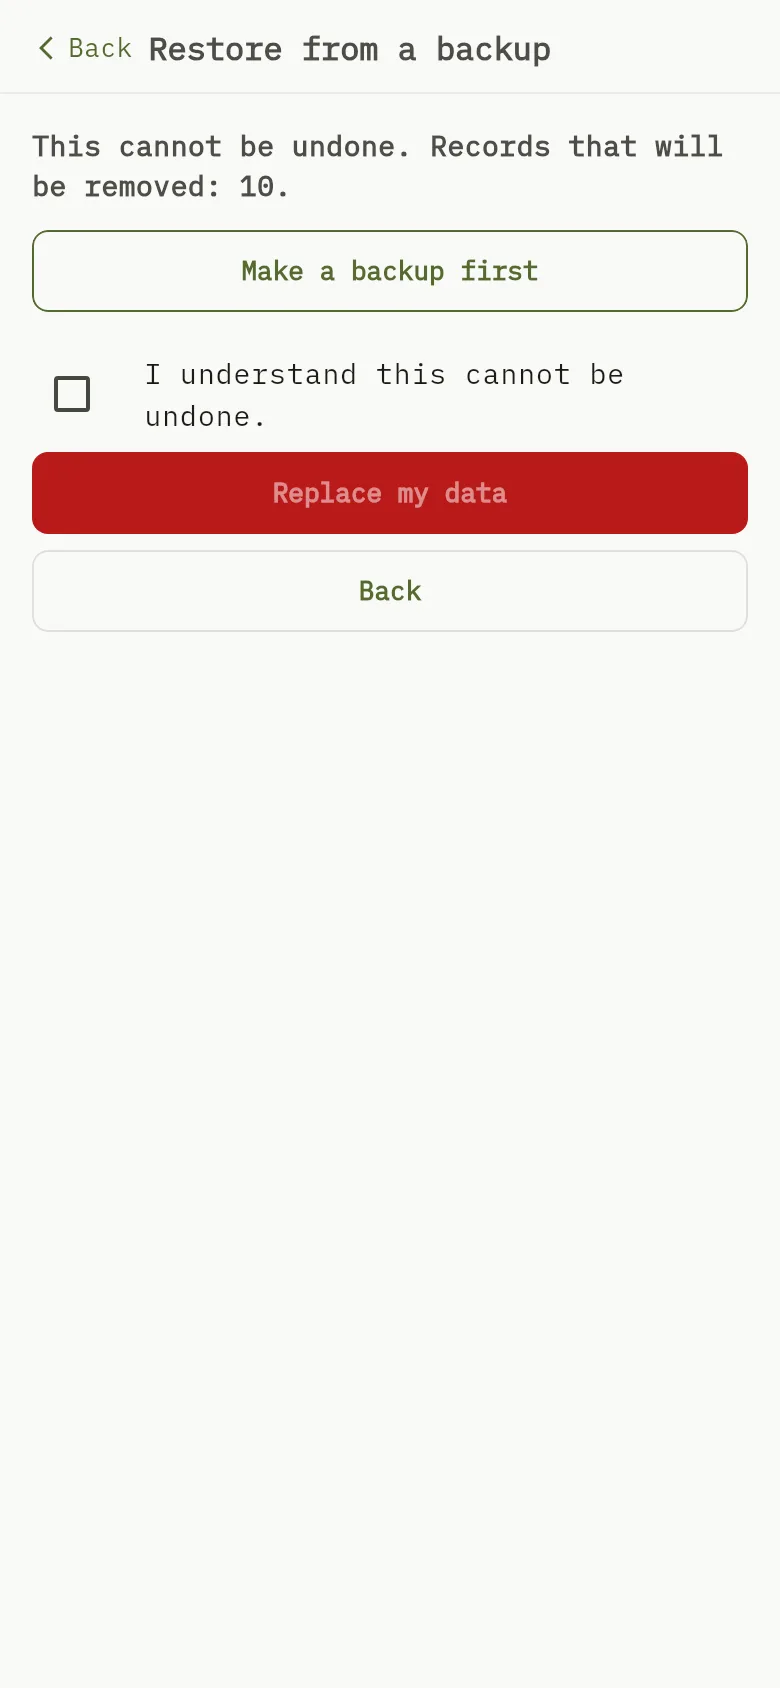
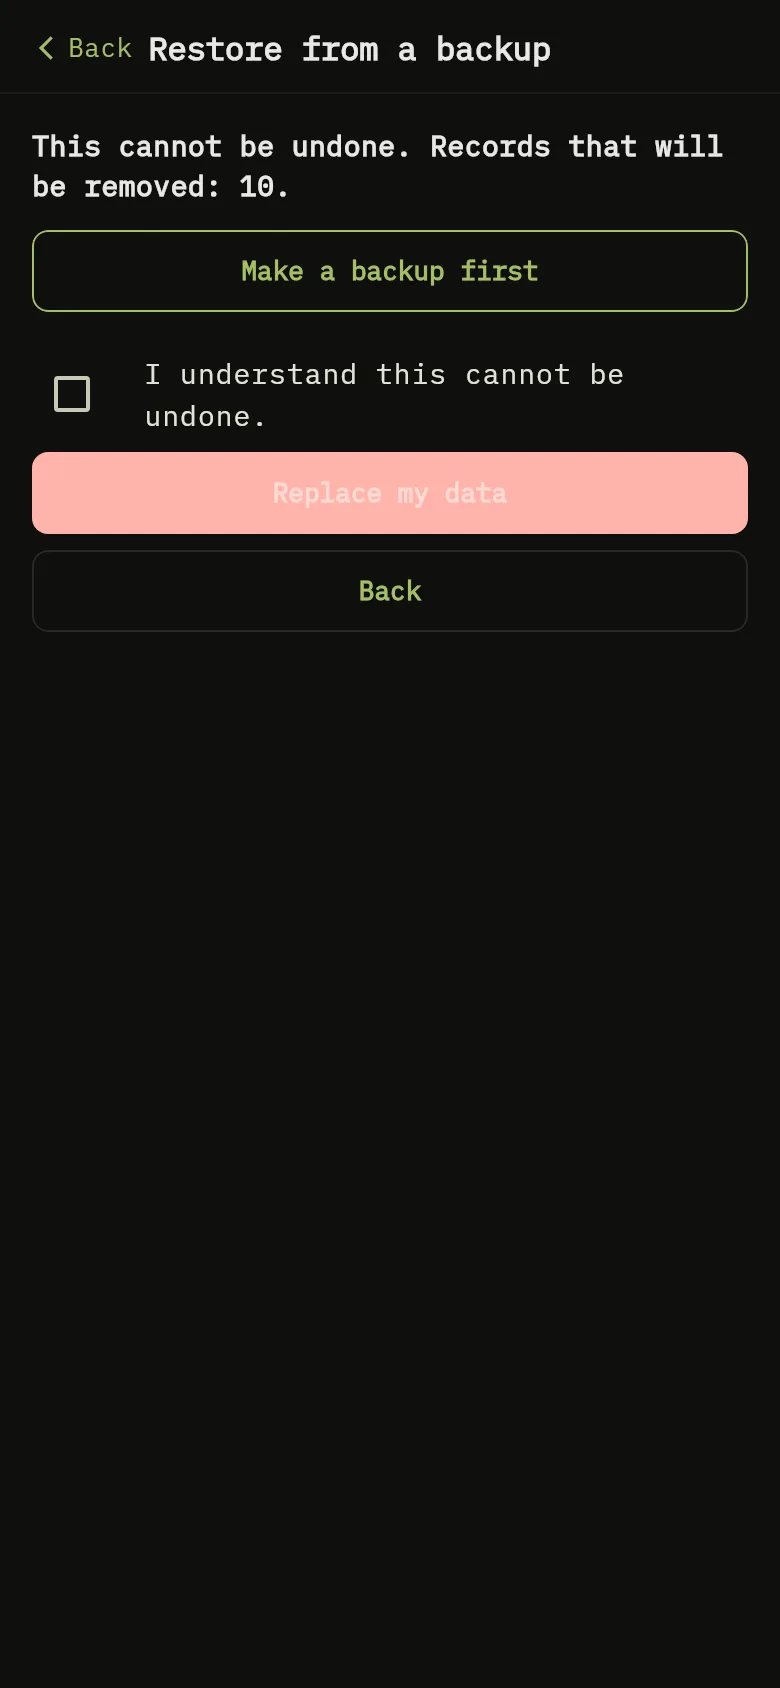
The screen of the mobile app warning that replacing cannot be undone and how many records will be removed, with a checkbox to confirm and the Replace my data button. 5: If you chose Replace my data, a warning says that this cannot be undone and how many records will be removed. You can Make a backup first. To go on, tick I understand this cannot be undone., then tap Replace my data; 6: If you chose Replace my data, a warning says that this cannot be undone and how many records will be removed. You can Make a backup first. To go on, tick I understand this cannot be undone., then tap Replace my data; 7: If you chose Replace my data, a warning says that this cannot be undone and how many records will be removed. You can Make a backup first. To go on, tick I understand this cannot be undone., then tap Replace my data.The screen of the mobile app warning that replacing cannot be undone and how many records will be removed, with a checkbox to confirm and the Replace my data button. 5: If you chose Replace my data, a warning says that this cannot be undone and how many records will be removed. You can Make a backup first. To go on, tick I understand this cannot be undone., then tap Replace my data; 6: If you chose Replace my data, a warning says that this cannot be undone and how many records will be removed. You can Make a backup first. To go on, tick I understand this cannot be undone., then tap Replace my data; 7: If you chose Replace my data, a warning says that this cannot be undone and how many records will be removed. You can Make a backup first. To go on, tick I understand this cannot be undone., then tap Replace my data.
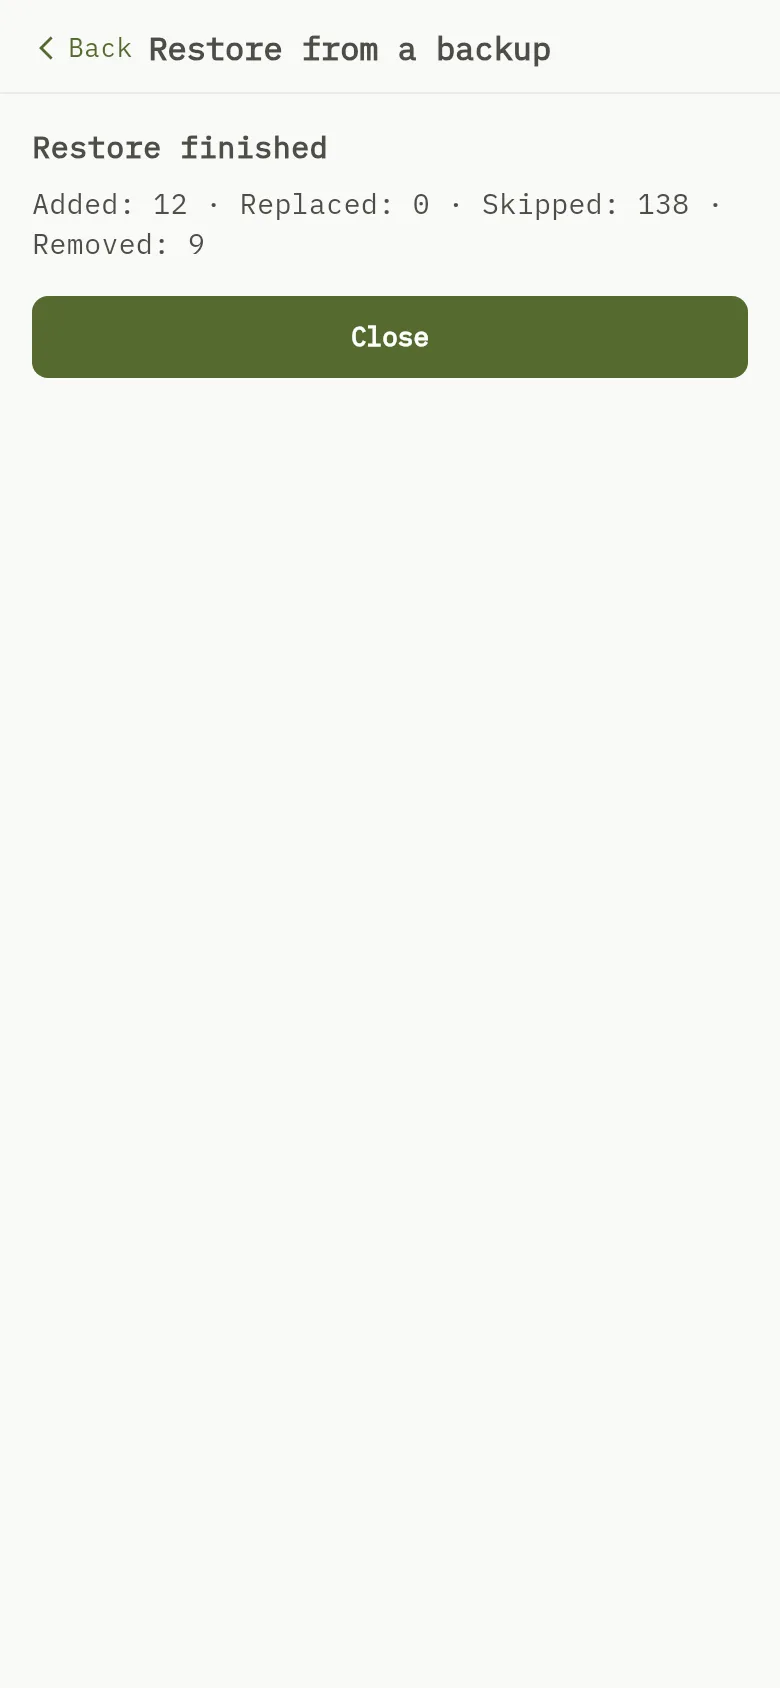
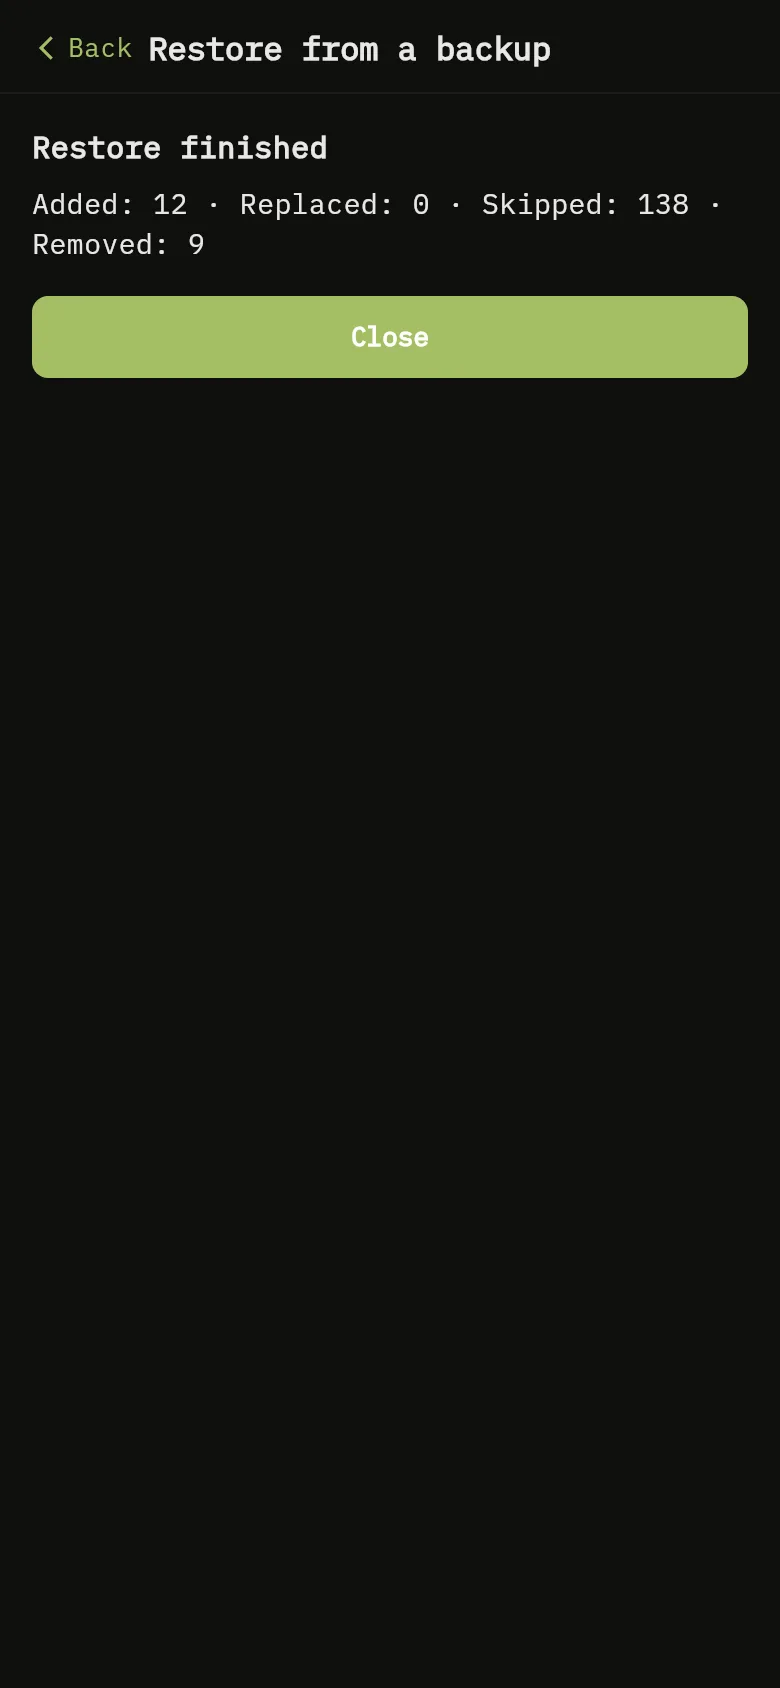
The Restore finished screen of the mobile app, with the number of records added, replaced, skipped and removed. 8: Restore finished shows the counts “Added”, “Replaced”, “Skipped” and “Removed”. If the file can’t be restored, for example because it isn’t a WisExpense backup or has been changed, the app says so and nothing is changed. Restored records don’t send you budget alerts.The Restore finished screen of the mobile app, with the number of records added, replaced, skipped and removed. 8: Restore finished shows the counts “Added”, “Replaced”, “Skipped” and “Removed”. If the file can’t be restored, for example because it isn’t a WisExpense backup or has been changed, the app says so and nothing is changed. Restored records don’t send you budget alerts.
  1. Tap More, scroll to Your data and tap Restore from backup. The Restore from a backup screen opens.
  2. Tap Choose a backup file (.xlsx) Marker 1 and pick your file. The screen reads Checking the file….
  3. The screen shows What this backup contains, with the date it was made. The table lists, for each kind of data, what is To add and what is Already there (skipped) Marker 2.
  4. Under How should it be restored? choose a mode Marker 3. Nothing is chosen for you.
    • Add to my data adds what isn’t there yet. Anything already in your data stays as it is.
    • Replace my data makes your data the backup. Anything that isn’t in the file is removed.
  5. Tap Restore Marker 4.
  6. If you chose Replace my data, a warning says that this cannot be undone and how many records will be removed Marker 5. You can Make a backup first. To go on, tick I understand this cannot be undone. Marker 6, then tap Replace my data Marker 7.

Warning

Replacing cannot be undone. Wallets shared with other people that aren’t in the file are kept as they are. Make a backup first if you are not sure.

What you see

Restore finished shows the counts “Added”, “Replaced”, “Skipped” and “Removed” Marker 8. If the file can’t be restored, for example because it isn’t a WisExpense backup or has been changed, the app says so and nothing is changed. Restored records don’t send you budget alerts.

Back up your data, Compare the plans.