WisExpenseOpen the app
Topics

Scan a receipt

Fill in a new expense from a photo of a receipt, then check it and save.

Needs the Premium plan

Show steps for

Scanning reads a photo of a receipt and fills in a new transaction: the amount, the date and, when it recognises them, the wallet, provider and category. You check the result, then save.

Before you start

You need the Premium or Collaboration plan: Premium includes 50 scans a month and Collaboration 200. Your scans start again at the beginning of each month (UTC). See Compare the plans. On the Free plan, the scan button is marked Premium feature.

Scanning is offered on a new expense or income, not on a transfer or when you edit a transaction. Have a clear photo of one receipt, under 10 MB: a JPEG, PNG or HEIC photo, and on the web a PDF too.

Steps

Web
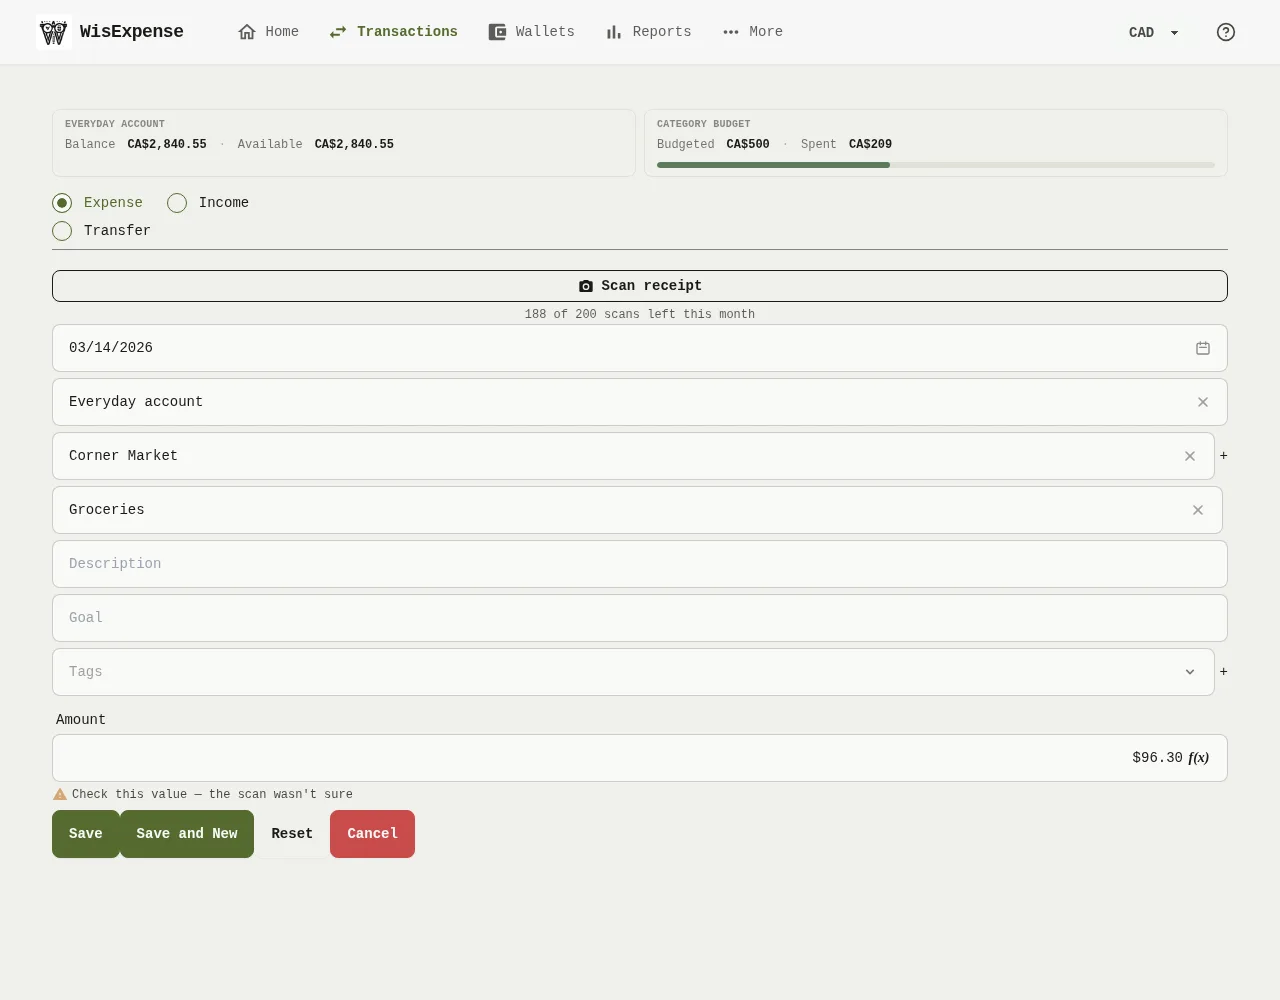
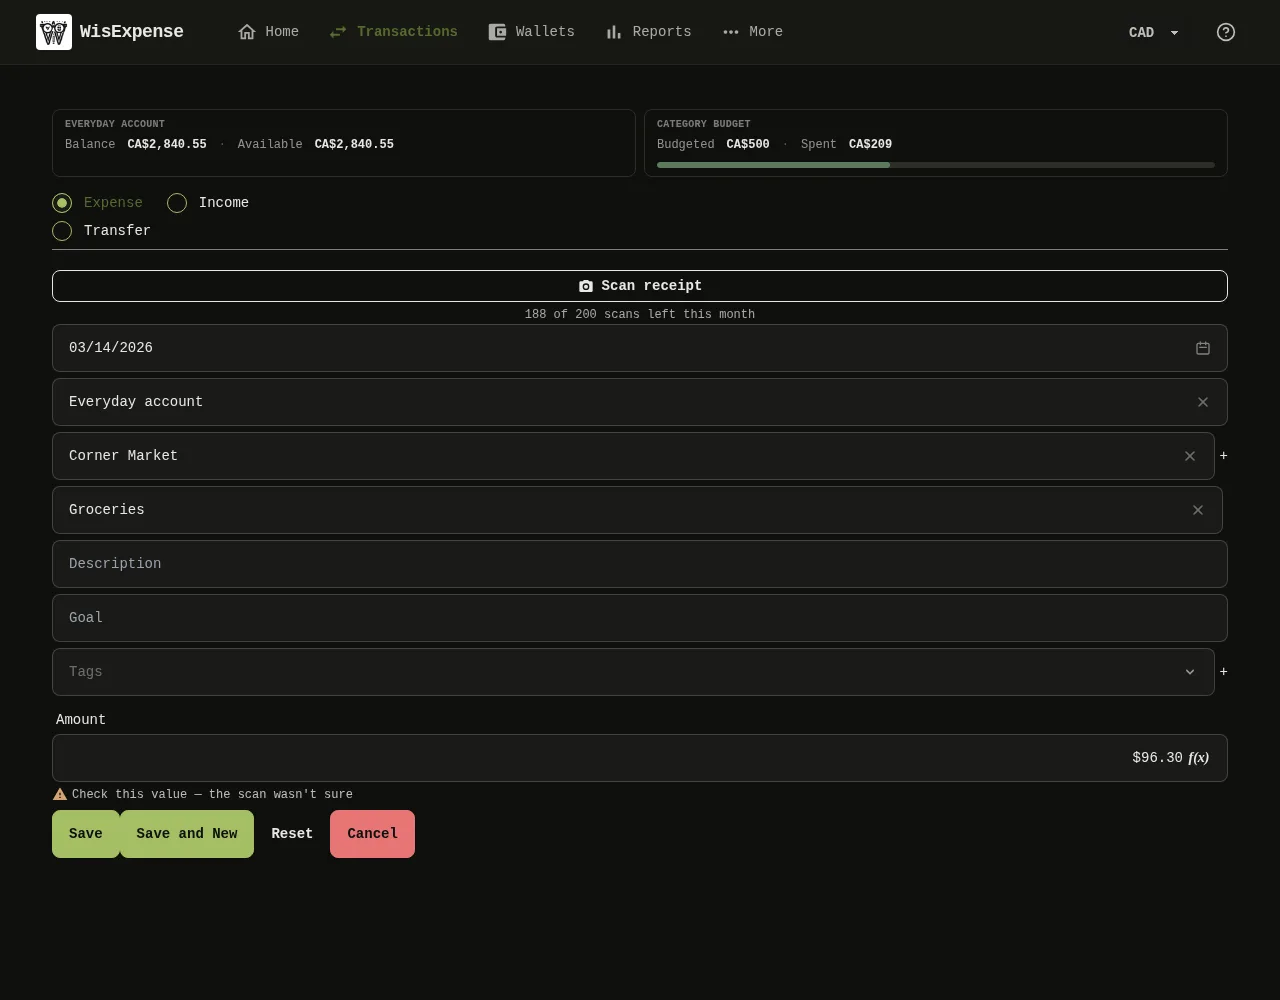
The new transaction form of the web app after a scan: the Scan receipt button with the number of scans left this month under it, the provider and amount filled in, and a line under the amount asking you to check it. 1: Select Scan receipt. Under the button you see how many scans you have left this month; 2: Check what the scan filled in: the date, the wallet, the provider, the category and the amount. Where the scan wasn’t sure, a line under the field asks you to check the value. Correct it if needed; the line goes away when you change the field; 3: Check what the scan filled in: the date, the wallet, the provider, the category and the amount. Where the scan wasn’t sure, a line under the field asks you to check the value. Correct it if needed; the line goes away when you change the field; 4: Check what the scan filled in: the date, the wallet, the provider, the category and the amount. Where the scan wasn’t sure, a line under the field asks you to check the value. Correct it if needed; the line goes away when you change the field.The new transaction form of the web app after a scan: the Scan receipt button with the number of scans left this month under it, the provider and amount filled in, and a line under the amount asking you to check it. 1: Select Scan receipt. Under the button you see how many scans you have left this month; 2: Check what the scan filled in: the date, the wallet, the provider, the category and the amount. Where the scan wasn’t sure, a line under the field asks you to check the value. Correct it if needed; the line goes away when you change the field; 3: Check what the scan filled in: the date, the wallet, the provider, the category and the amount. Where the scan wasn’t sure, a line under the field asks you to check the value. Correct it if needed; the line goes away when you change the field; 4: Check what the scan filled in: the date, the wallet, the provider, the category and the amount. Where the scan wasn’t sure, a line under the field asks you to check the value. Correct it if needed; the line goes away when you change the field.
  1. Open the new transaction form, as in Record an expense, and leave the type on Expense or Income.
  2. Select Scan receipt Marker 1. Under the button you see how many scans you have left this month.
  3. Choose the photo or file of the receipt. On a phone or tablet, the browser may open the camera. While the receipt is being read, the button shows that it is working.
  4. Check what the scan filled in: the date, the wallet, the provider Marker 2, the category and the amount Marker 3. Where the scan wasn’t sure, a line under the field asks you to check the value Marker 4. Correct it if needed; the line goes away when you change the field.
  5. Select Save.

Mobile

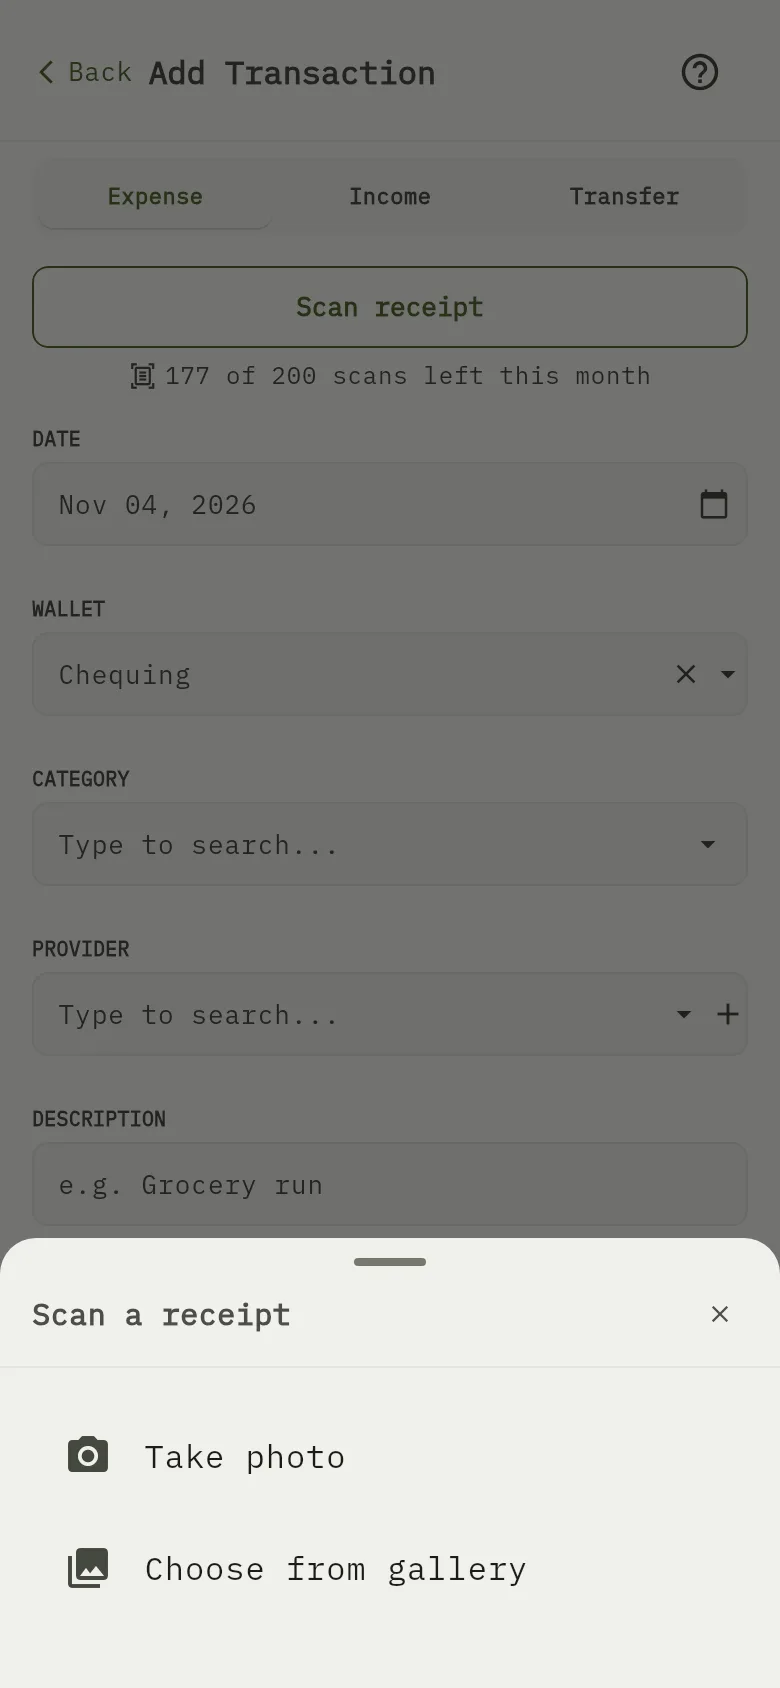
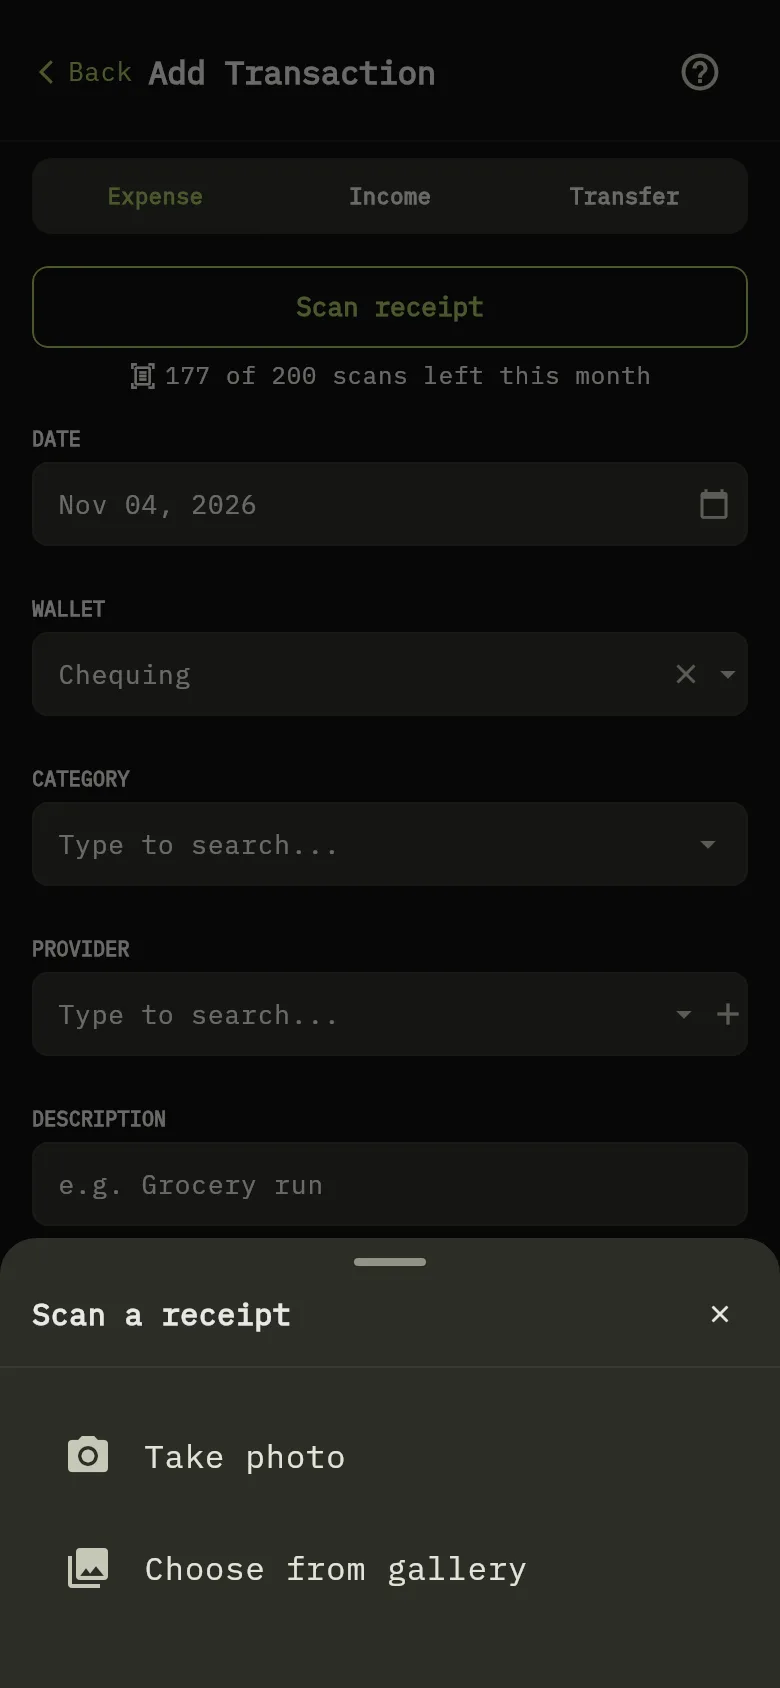
The new transaction screen of the mobile app with the Scan a receipt sheet open, offering Take photo and Choose from gallery. 5: Open the new transaction screen, as in Record an expense, and tap Scan receipt. Under the button you see how many scans you have left this month; 6: In the Scan a receipt sheet, tap Take photo to photograph the receipt, or Choose from gallery to use a photo you already have. If your phone asks, allow WisExpense to use the camera or your photos; 7: In the Scan a receipt sheet, tap Take photo to photograph the receipt, or Choose from gallery to use a photo you already have. If your phone asks, allow WisExpense to use the camera or your photos.The new transaction screen of the mobile app with the Scan a receipt sheet open, offering Take photo and Choose from gallery. 5: Open the new transaction screen, as in Record an expense, and tap Scan receipt. Under the button you see how many scans you have left this month; 6: In the Scan a receipt sheet, tap Take photo to photograph the receipt, or Choose from gallery to use a photo you already have. If your phone asks, allow WisExpense to use the camera or your photos; 7: In the Scan a receipt sheet, tap Take photo to photograph the receipt, or Choose from gallery to use a photo you already have. If your phone asks, allow WisExpense to use the camera or your photos.
  1. Open the new transaction screen, as in Record an expense, and tap Scan receipt Marker 5. Under the button you see how many scans you have left this month.
  2. In the Scan a receipt sheet, tap Take photo Marker 6 to photograph the receipt, or Choose from gallery Marker 7 to use a photo you already have. If your phone asks, allow WisExpense to use the camera or your photos.
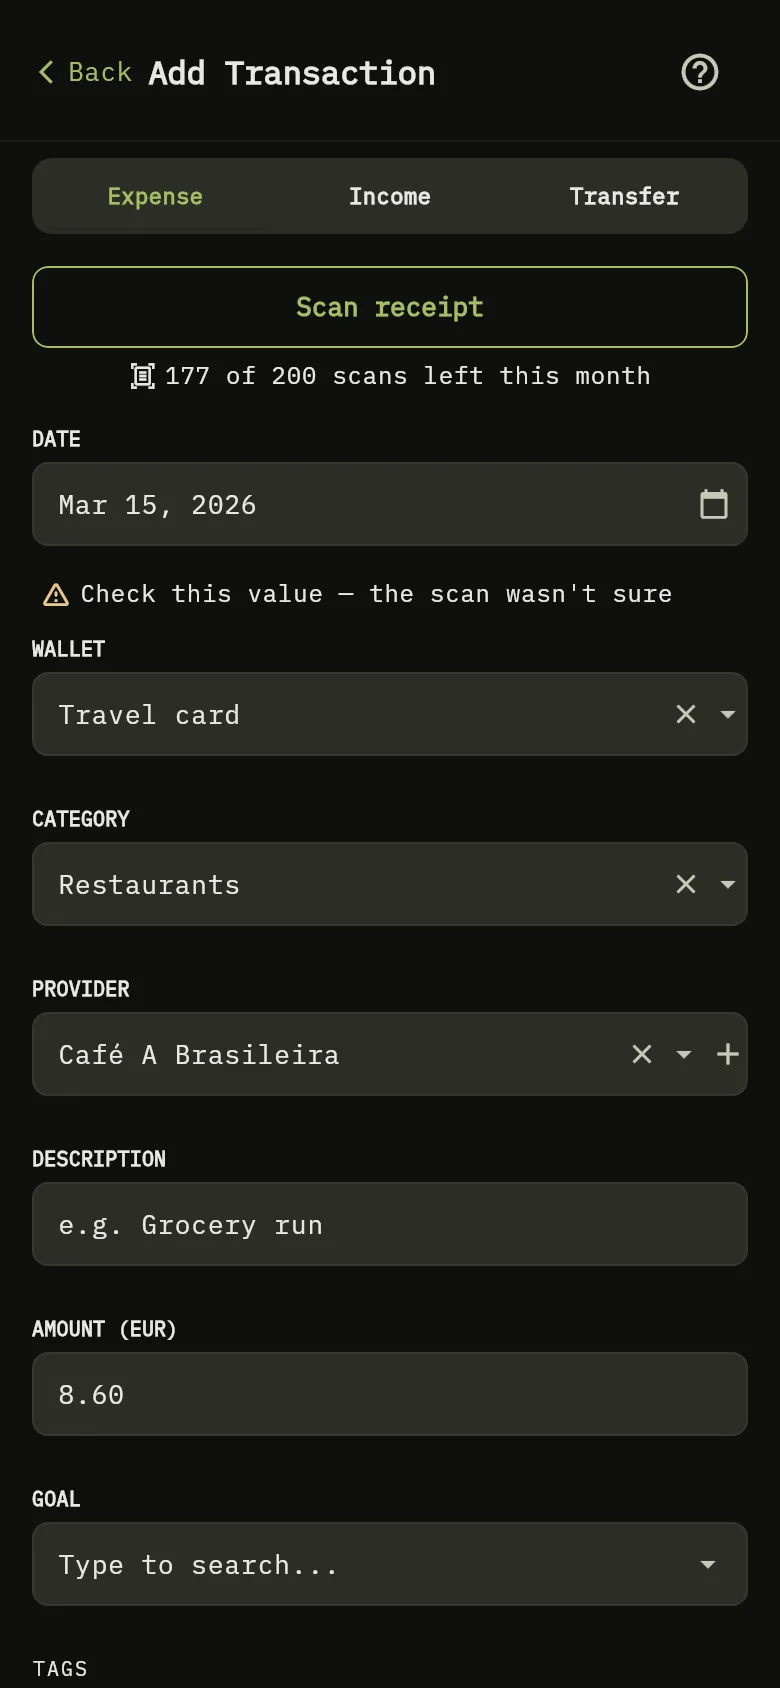
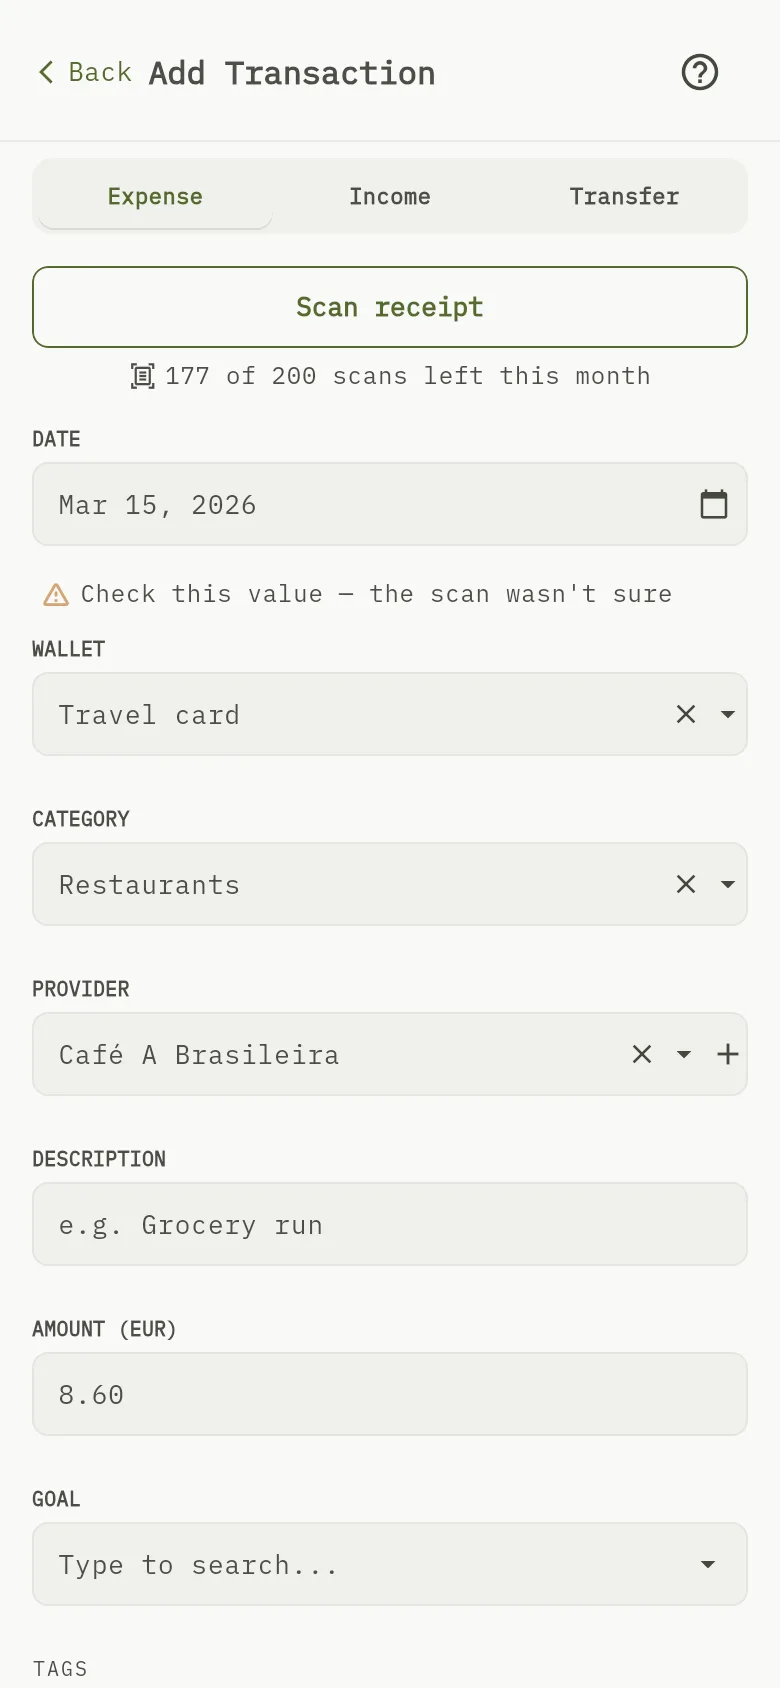
The new transaction screen of the mobile app after a scan, with the date, wallet, category, provider and amount filled in and a line under the date asking you to check it. 3: Check what the scan filled in: the date, the wallet, the category, the provider and the amount. Where the scan wasn’t sure, a line under the field asks you to check the value. Correct it if needed; 5: Open the new transaction screen, as in Record an expense, and tap Scan receipt. Under the button you see how many scans you have left this month; 8: Check what the scan filled in: the date, the wallet, the category, the provider and the amount. Where the scan wasn’t sure, a line under the field asks you to check the value. Correct it if needed.The new transaction screen of the mobile app after a scan, with the date, wallet, category, provider and amount filled in and a line under the date asking you to check it. 3: Check what the scan filled in: the date, the wallet, the category, the provider and the amount. Where the scan wasn’t sure, a line under the field asks you to check the value. Correct it if needed; 5: Open the new transaction screen, as in Record an expense, and tap Scan receipt. Under the button you see how many scans you have left this month; 8: Check what the scan filled in: the date, the wallet, the category, the provider and the amount. Where the scan wasn’t sure, a line under the field asks you to check the value. Correct it if needed.
  1. Check what the scan filled in: the date Marker 8, the wallet, the category, the provider and the amount Marker 3. Where the scan wasn’t sure, a line under the field asks you to check the value. Correct it if needed.
  2. Tap Save.

If the scan won’t start

Web

On the Free plan, selecting Scan receipt opens the Upgrade your plan window instead. It says that receipt scanning is a Premium feature Marker 9. Choose a plan to unlock it: see Upgrade your plan.
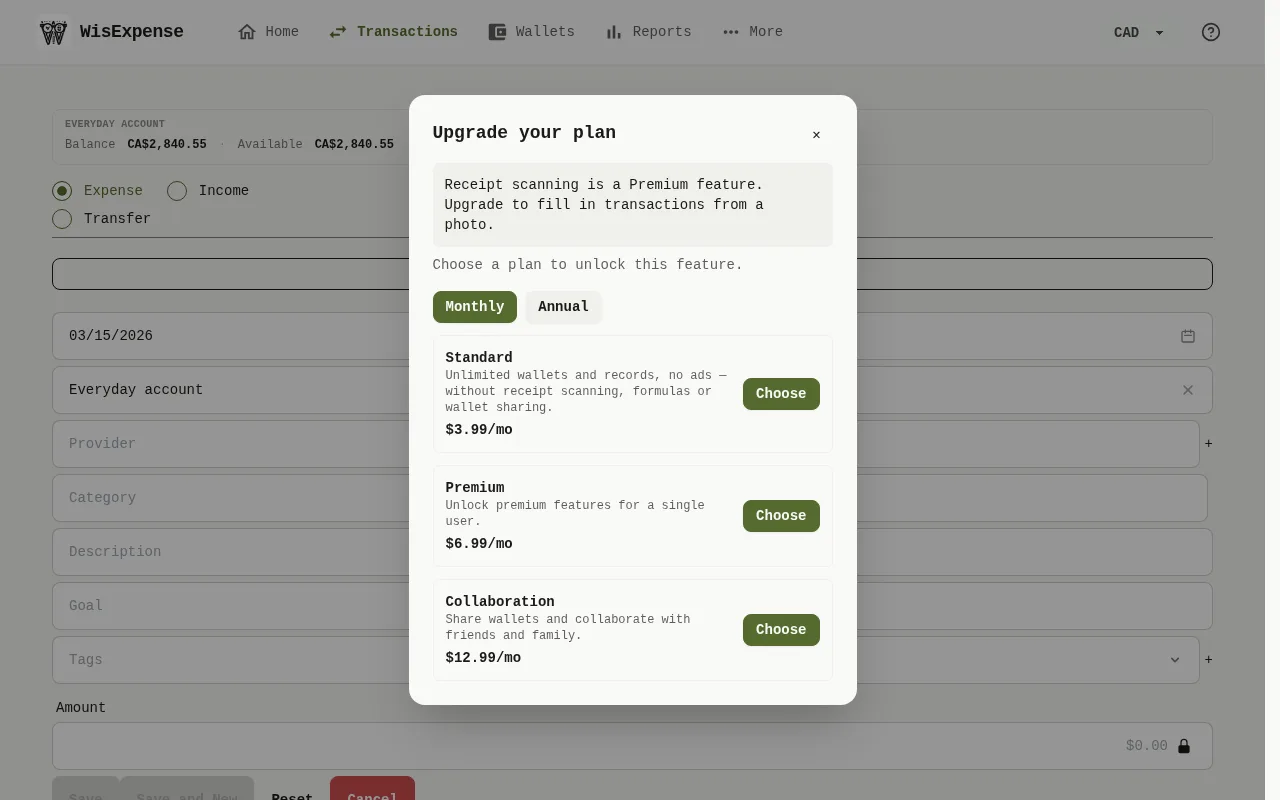
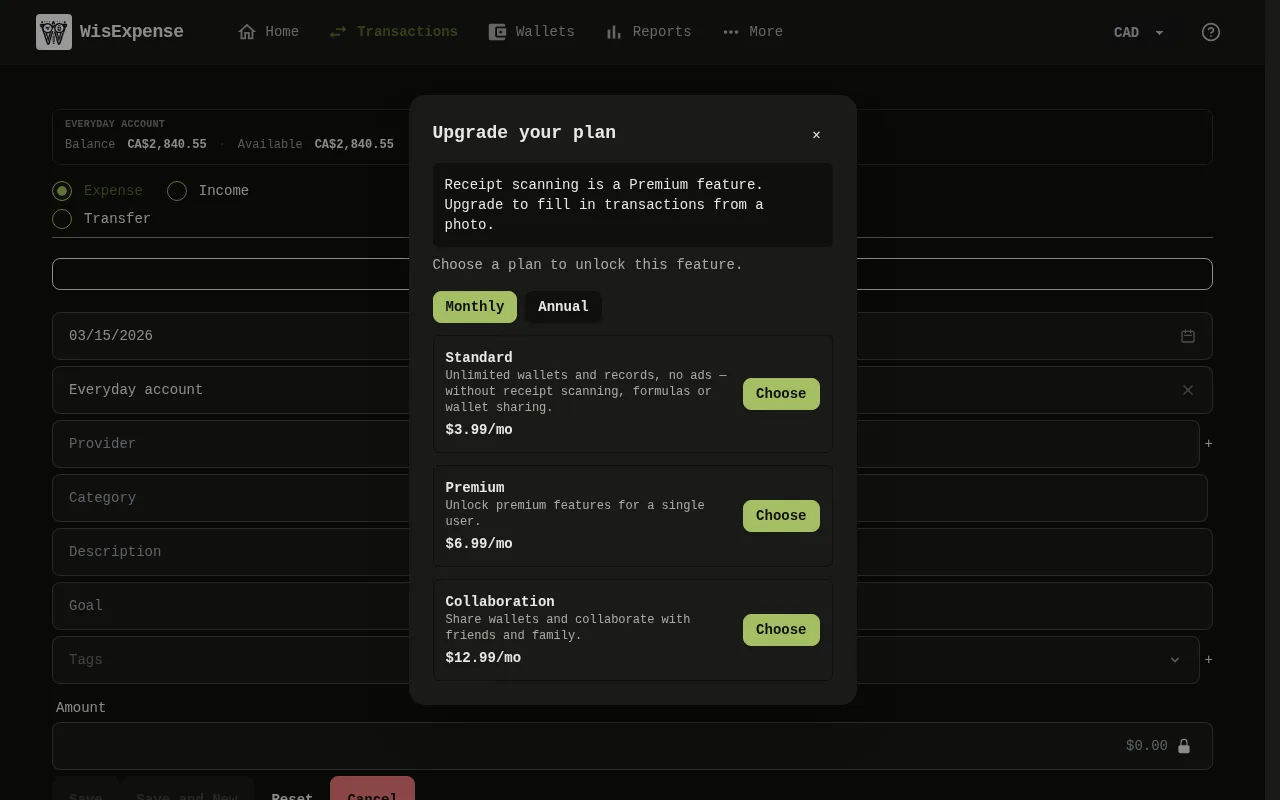
The Upgrade your plan window of the web app over the new transaction form, saying that receipt scanning is a Premium feature, with a Premium plan and a Collaboration plan to choose from. 1: Select Scan receipt. Under the button you see how many scans you have left this month; 9: On the Free plan, selecting Scan receipt opens the Upgrade your plan window instead. It says that receipt scanning is a Premium feature. Choose a plan to unlock it: see Upgrade your plan.The Upgrade your plan window of the web app over the new transaction form, saying that receipt scanning is a Premium feature, with a Premium plan and a Collaboration plan to choose from. 1: Select Scan receipt. Under the button you see how many scans you have left this month; 9: On the Free plan, selecting Scan receipt opens the Upgrade your plan window instead. It says that receipt scanning is a Premium feature. Choose a plan to unlock it: see Upgrade your plan.

When you have used all your scans for the month, the same window says so and gives the date your scans start again Marker 9. On Premium, it offers Collaboration, which includes 200 scans a month.
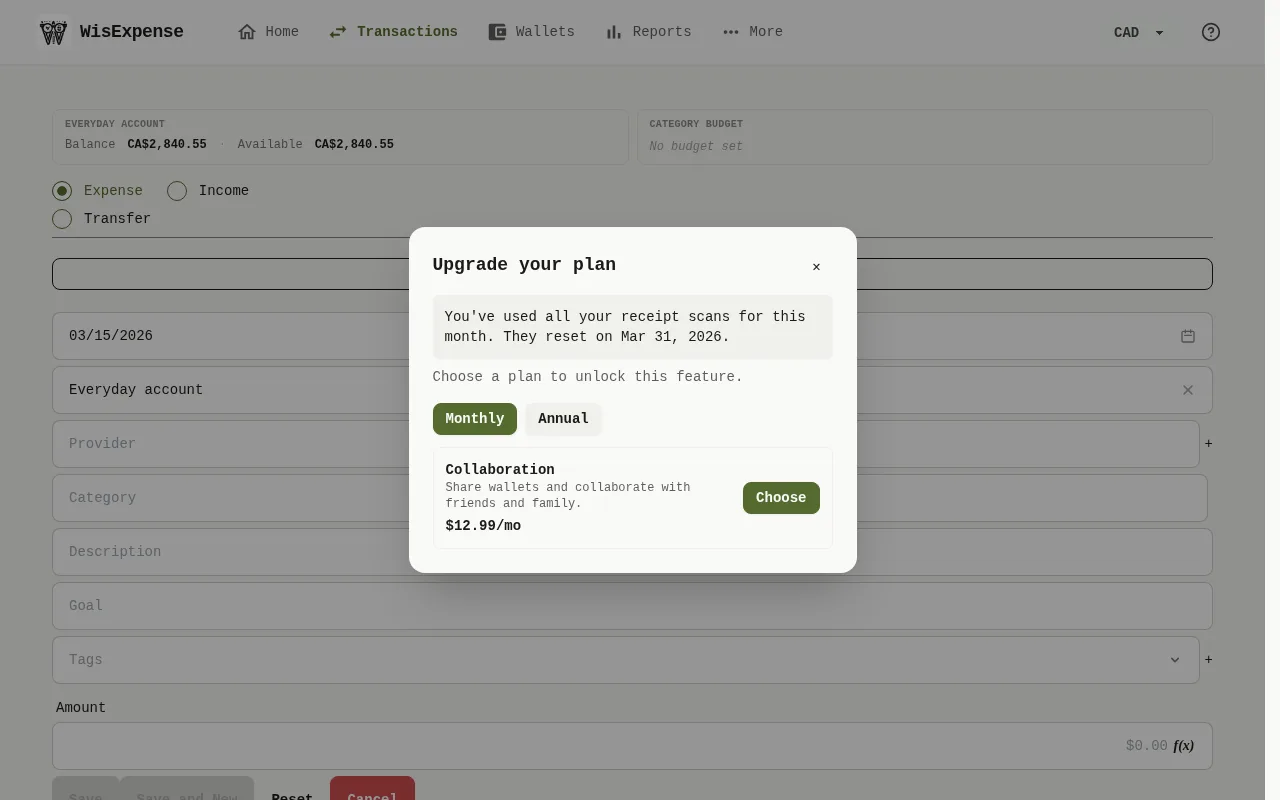
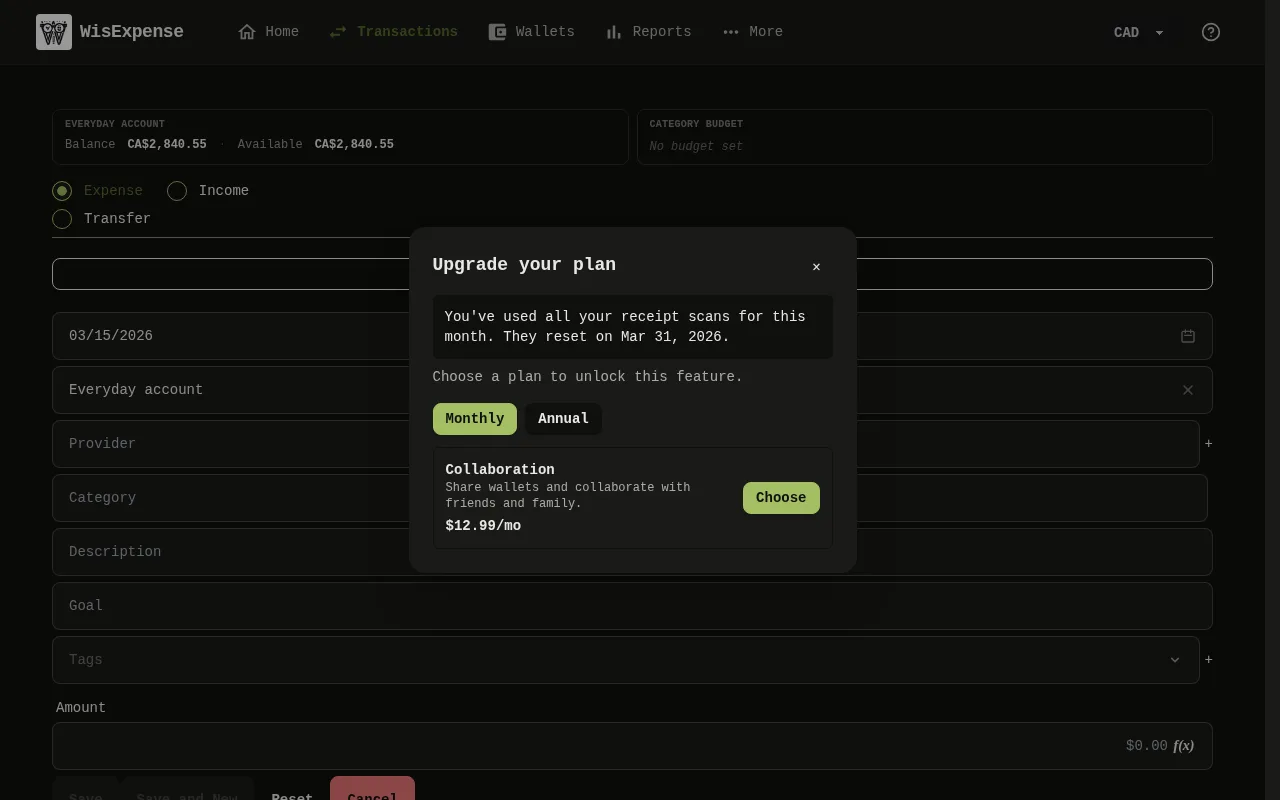
The Upgrade your plan window of the web app saying that all the receipt scans for this month are used and when they reset, with only the Collaboration plan to choose. 1: Select Scan receipt. Under the button you see how many scans you have left this month; 9: On the Free plan, selecting Scan receipt opens the Upgrade your plan window instead. It says that receipt scanning is a Premium feature. Choose a plan to unlock it: see Upgrade your plan.The Upgrade your plan window of the web app saying that all the receipt scans for this month are used and when they reset, with only the Collaboration plan to choose. 1: Select Scan receipt. Under the button you see how many scans you have left this month; 9: On the Free plan, selecting Scan receipt opens the Upgrade your plan window instead. It says that receipt scanning is a Premium feature. Choose a plan to unlock it: see Upgrade your plan.

What you see

The form is filled in, but nothing is saved until you save it. Each receipt that is read uses one of your scans for the month, and the number under the button goes down.

Record an expense, Compare the plans, Upgrade your plan.